PC Plus HelpDesk - issue 266
 |
This month, Paul Grosse gives you more
insight into some of the topics dealt with in HelpDesk.
|
 |
HelpDesk
|
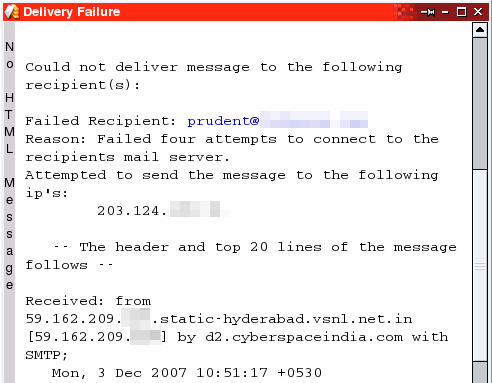 Email delivery failure
|
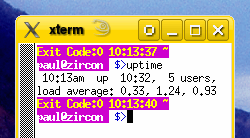 Last reboot time
|
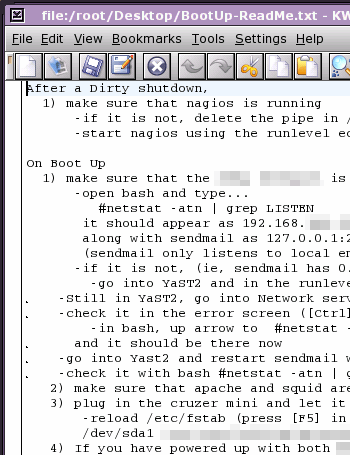 Infrequent reboots
Learn to type
These programs were bought and played a happy little tune when you started them up. Since then, things have changed a little - operating
systems have become stable, multi-user, networked,
internationalised and free. The layouts have encompassed
many variants and, sticking to just English, include
Dvorak and other layouts (depending on the OS you use). |
 If you've decided to learn how to type using
an English Dvorak layout, you might be in for a shock
with some operating systems - they offer only the US
Dvorak version. If you've decided to learn how to type using
an English Dvorak layout, you might be in for a shock
with some operating systems - they offer only the US
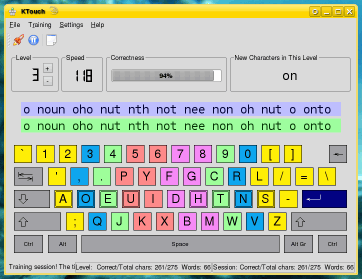
Dvorak version.You can learn to touch-type on Linux using a program called KTouch. This is part of KDE and if you have it installed, you can find this under 'Edutainment', 'Teaching', 'KTouch'. If you have SUSE, you should see it as one of the programs on your disc set and you don't need to download anything else to install it. The program itself is easy to configure and there are a number of keyboard layouts to choose from. Click on 'Settings', 'Keyboard Layouts', 'English (en.dvorak)' to get the one you want. There are a number other layouts as well including varieties of Bulgarian, Danish, German, Hungarian and Polish keyboards. To use the program, select a level and just start typing - no animations, no music, just getting on with teaching you how to type. |
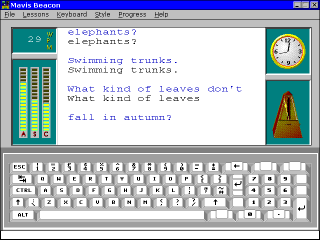 Years ago,
you might have learned to type using a program like the
one on the right - Mavis Beacon (for Windows) from 1993.
Years ago,
you might have learned to type using a program like the
one on the right - Mavis Beacon (for Windows) from 1993.
|
 Server Message Block
|
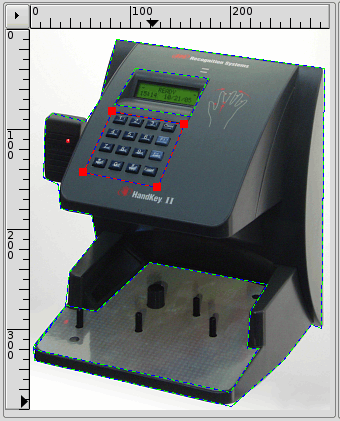 Select a shape on the left (ellipse,
rectangle or polygon) and then click on the image where
you want the points to be - you will see how the border
appears as you draw it. If you are using a polygon,
double-click to finish. Select a shape on the left (ellipse,
rectangle or polygon) and then click on the image where
you want the points to be - you will see how the border
appears as you draw it. If you are using a polygon,
double-click to finish.When you have finished, another
dialogue box will appear allowing you to type in a link
or edit the co-ordinates. |
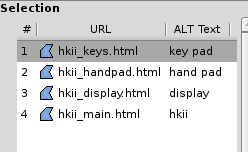 As each area is completed, it appears in the
area on the right - you can edit these again by selecting
an area and clicking on the info button. You can also
change the order of the areas (if you have one above
another and want to change the priorities of them) by
selecting one and clicking on the up and down arrows. As each area is completed, it appears in the
area on the right - you can edit these again by selecting
an area and clicking on the info button. You can also
change the order of the areas (if you have one above
another and want to change the priorities of them) by
selecting one and clicking on the up and down arrows.When
you have finished, click on 'Save' and the file with the
image map HTML code in it will be saved so that you can
just copy it into your page or use it as a web part in an
SSI if you want to use it in many pages and make it easy
to edit them all if you want to change the image. <img src="hkii.png" width="300" height="381" border="0" usemap="#map" />
<map name="map">
<!-- #$-:Image Map file created by GIMP Imagemap Plugin -->
<!-- #$-:GIMP Imagemap Plugin by Maurits Rijk -->
<!-- #$-:Please do not edit lines starting with "#$" -->
<!-- #$VERSION:2.0 -->
<!-- #$AUTHOR:Paul Grosse -->
<area shape="poly" coords="82,82,154,95,127,158,53,143" alt="key pad"
href="hkii_keys.html" />
{snipped list of areas}
</map>
Simply use the file as an SSI (Server-Side Include) or copy and paste the text into other html files where you need it. By using an SSI, you will be making it easier to edit all of the files used by the image map just by changing the map in the future - say you want to edit a menu or use a different image. Click here to see an image and map file html fragment in a new window. |
 Easy image maps
|
 Manipulating image maps
|
 Printers and CUPS