PC Plus HelpDesk - issue 255
 |
This month, Paul Grosse gives you more
insight into some of the topics dealt with in HelpDesk
|
 |
HelpDesk
Retrieving the Vista Taskbar
The unfortunate thing about this is that it is not
obvious how it got there and no matter how hard you look,
you cannot find anywhere how to change it. |
 When Windows 95 came out, I had a similar
experience when I was in my local library. The librarian
asked me if I could correct the same problem and I spent
a good half hour doing what you might well do without
having read this first. The solution, however, is
surprisingly simple - you just have to know about it. When Windows 95 came out, I had a similar
experience when I was in my local library. The librarian
asked me if I could correct the same problem and I spent
a good half hour doing what you might well do without
having read this first. The solution, however, is
surprisingly simple - you just have to know about it.All you have to do is click the mouse onto an empty part of the task bar and drag it back to the edge of the display where you want it to be. That is it. Dragging it to the side can be done accidentally - given the right circumstances - although it is probably done as a joke. If you want to eliminate accidental Taskbar moving, right click on an empty part of it and then, in the menu that appears, click on 'Lock the Taskbar'. Now, they cannot claim that any future mischief was accidental. Of course, if you found that the Taskbar was locked then you know that it was malicious. |
 After
lunch, you might return to your computer to find that
someone has changed things around a bit. The thing that
you notice however, is that the Taskbar is not at the
bottom but up one of the sides or across the top.
After
lunch, you might return to your computer to find that
someone has changed things around a bit. The thing that
you notice however, is that the Taskbar is not at the
bottom but up one of the sides or across the top.Time your CGIsMany websites run CGIs: sometimes so that you can use databases or process other information' and, sometimes simply because it makes life easier (menus on sites that change are easier to implement as a CGI and then, if your site changes, you only have to edit your script instead of every page). However, if you are using scripts that are quite complex and take a fair amount of computing and, somebody wants to take your site out by giving it something time consuming to do (and make it do it a lot - such as a Distributed Denial of Service attack (DDoS)), you need to know that you are not making your server perform unnecessary tasks. The way to do this is to time your CGI scripts. Of course, deciding how much of a page should be static and how much should be calculated at the time it is run is always a problem and it depends upon how much of your page never changes and of course, the percentage load on your server. With Apache on Gentoo or Ubuntu running on a Sun Fire T1000 Server with an UltraSPARC T1 processor - that's eight processors running 32 threads on one chip - then it doesn't really matter how inefficient you make it. However, if you are using a PC then it is probably better to make as much of the page as static as possible and use SSIs (Server-Side Includes) for dynamic content.
Suppose your CGI is called '/home/paul/bin/gp1'. Enter the following... time /home/paul/bin/gp1 You can see the results in the image on the right. The 'real' is the time from beginning to end whereas 'user' and 'sys' are times used. So here, the 0.646s is how long the program took to execute and it took a total of 80ms of computer time to run. As far as delivering your pages quickly is concerned, the 'real' time is important here. As far as your computer use is concerned, the total of the 'user' and 'sys' times is important. You can use this to work out how effective the edits to your program are by using the 'time' program in this way. |
 You can determine CGI
script run times very easily.
You can determine CGI
script run times very easily.What is ROT13?
Well, ROT13 is short for 'rotate 13' and relates to a
Caesar cipher where each letter is moved along by 13
characters. In this way, an 'A' becomes an 'N', a 'B'
becomes an 'O' and so on. You can see from the diagram
that it is easy to 'encipher' (for want of a better word)
and just as easy to 'decipher'. |
 It is not meant as a secure encryption
method but merely as a way to obfuscate text. In that
way, it can be used to hide answers to questions or
spoilers for stories. All that the reader has to do is
put it through the ROT13 process a second time. To the
casual reader, it is quite effective. It is not meant as a secure encryption
method but merely as a way to obfuscate text. In that
way, it can be used to hide answers to questions or
spoilers for stories. All that the reader has to do is
put it through the ROT13 process a second time. To the
casual reader, it is quite effective.For instance, you would have to sit down and work out what 'gur ohgyre qvq vg' meant. If you were looking at that text on a computer, you might have an add-on in your browser that would ROT13 any highlighted text for you. In the image on the right, you can see the action of a ROT13 program, written in Perl (using transliteration), that runs off the command line. If you click here, you can open up the directory with the program in it. |
You can encode any text you like as long
as you remember that only the letters of the alphabet
will be changed. Take the following, the beginning of a
first chapter for instance...
It is amazing how quickly it starts to look as though it is not actually written in English (I can assure you that it is). I'll leave it up to you as to whether you think it looks more like Turkish or EBCDIC. Without a program, this turns into a nightmare although, if you type the right part of it into Google, you can read the rest of it in plain text. |
 You will
have seen it mentioned on web pages and in archived
emails in footers and everywhere so what is ROT13
encryption and here is the really difficult question; Is
'Double ROT13 Encryption' better?
You will
have seen it mentioned on web pages and in archived
emails in footers and everywhere so what is ROT13
encryption and here is the really difficult question; Is
'Double ROT13 Encryption' better?Perfect display coloursLinux is all about choice and you can change your window decorations quite easily (these are the frame that goes around the outside of the window and the title bar). One potential problems though, is that the colour scheme that you have chosen doesn't quite match up the window background with the colours in the window decorations. You can play around with this and, if it is like the Yamm window decoration in the screenshot, there are several possibilities, depending upon your taste. Yamm's title bar (like many of them) has a gradient on it that makes it look curved so, this means that you can pick a number of colours and get the right level of lightness you need. If you find that the colour is too dark, you can go for a lighter one. So, how do you do it? The answer is easier than you would think. Open Control Centre, click on 'Appearance & Themes' then 'Colours' and then click on the 'Window Background' which should then appear in the drop-down combo in the 'Widget Colour' area. This area has on it any menus that exist and goes right up to the window decorations.
When you've clicked on it, you can add it to the custom colours if you want to (if you want your button colour the same, this is a good idea) then click on 'OK' and the dialogue box will disappear. Click on 'Apply' and your colours will now appear on your display. If you decide that the colour you have chosen isn't quite right and want to use a different part of the window decorations, just click on the button again. |
 Next, click on the elongated colour
button in that frame and the 'Select Colour'
dialogue box should open up.
Next, click on the elongated colour
button in that frame and the 'Select Colour'
dialogue box should open up.ps and grepIf you want to find out what is running, 'ps' and 'grep' are powerful and easy to use. Normally, you would see 'ps' as 'ps aux' - the 'aux' part is, seemingly, always there - and to someone who is new to this game, it is fairly easy to think that 'aux' refers to something like an auxiliary - there would be no reason to think otherwise. So, what does it mean? 'ps' has many command line options but 'aux' is actually three separate switches:
If we pipe the output of 'ps aux' to 'wc' and use wc's '-l' switch (the number of lines), we find that we have 213 processes running. Simply piping it to wc -l has saved a lot of work if all we wanted to do was count the number of processes. So, if a program that spawns a number of others, all with the same name, we can pipe the output from ps through 'grep' to filter out the unwanted lines - then piping grep's output to wc to count them. Counting the number of programs called 'smtarpit' then becomes as easy as entering the command line... ps aux | grep smtarpit | wc -l ...and we find that there are apparently 46. However, we are piping so 'grep smtarpit' is running when 'ps aux' is and therefore it will include 'grep smtarpit' in the list of processes it sends to grep in order to look for 'smtarpit' so remember to take one off the result. |
 In the screenshot,
just typing 'ps aux' on its own produces a lot of lines
of output which would take time to examine or count. This
is what I did first here...
In the screenshot,
just typing 'ps aux' on its own produces a lot of lines
of output which would take time to examine or count. This
is what I did first here...Grep's so goodOf course, grep's so good that there are a number of versions of it and some might well do just the job you want. In 'ps and grep' above, we used 'ps aux' to display a list of all processes running at the time and then, we used 'grep' to filter out the unwanted processes and finally, 'wc' to count them. If we weren't interested in any of the process's details there is a variant of grep that, in its default use, just takes the name of a process and displays the PIDs of those processes.
In fact, if you type... pgrep anything | wc -l ...you should get '0' as your output - assuming that you are not running a process that actually is called 'anything'. There are other variants of grep:
Just for the morbidly curious, 'grep' stands for 'search globally for lines matching the regular expression and print them' which is why it is called 'grep'. |
 In the
screenshot, you can see 'ps' and 'pgrep'. 'pgrep'
combines 'ps' and 'grep' to make a useful command on its
own - and you can see that it does not count itself.
In the
screenshot, you can see 'ps' and 'pgrep'. 'pgrep'
combines 'ps' and 'grep' to make a useful command on its
own - and you can see that it does not count itself.Blobs'Blob', in its modern incarnation, is the name given to an opaque binary - a Binary Large OBject to be precise - and it is usually a program or library that is not accompanied by its source code. In effect, the whole of Windows is an example of a blob (collection). In the Linux world, normally, a program will come with its source code so that if you find an error or want to modify the program and you are familiar with the programming language (or can pay for someone who is), you can modify it yourself. However, there are programs that don't provide the source code - 'blobs'. With these, if you find a bug, you can never know how to fix it. Only the original writers of the program can make it work - if they can be bothered enough to do it. In effect, we don't know how many errors there are in opaque binaries because there is no transparency - they could be riddled with known vulnerabilities that the writers of such blobs are just keeping quiet about, hoping that they never get discovered. Normally, there is no problem with blobs as everything works well enough for enough of the time. However, if it is a security program you are using, you don't know if there is a back door written into it and you will never know. There was one case where the NVIDIA graphics driver blob for Linux (and possibly Solaris and BSD) had a buffer overrun vulnerability that allowed an attacker to run arbitrary code as root. The bug could be exploited locally or remotely via a remote X client or an X client that had visited a malicious web page. |
Automatic MD5 hashesIf you download any important files from the Internet, you will, no doubt, have come across MD5 hashes. Once you have downloaded the file, you can hash the file yourself and compare the result with the one you are supposed to get. If they are different, you know for certain that they are not binary equivalent. If the hashes are the same, you can say that it is quite unlikely that they are different and, to all intents and purposes, they are sufficiently likely to be the same that you can assume that they are. Using an MD5 has from a website means that what they hashed at the server end compares with what you have received at your end of the connection.
openssl dgst -md5 myfile.txt ...which would give the result '5eb63bbbe01eeed093cb22bb8f5acdc3' as you can see on the right. In the screenshot, you can see the processing as it appears on Linux (also the same in other UNIX-like OSes). The reason that it does not include a new line character is that in UNIX, the character is a newline character whereas in Mac OS X, it is just a carriage return and in DOS/Windows, it is both characters. By not including it, the same eleven character file can be created on any ASCII-based system and will produce the same MD5 hash. If you want to try out for yourself, you can open the
subdirectory with an ASCII file (mytext.txt) and an
EBCDIC file (mytext.text) by clicking here. The ASCII
file gives '5eb63bbbe01eeed093cb22bb8f5acdc3' and the
EBCDIC file gives '3f4ee6cad181e83b035cd45a583614e8' even
though they read exactly the same when opened on machines
that use their particular type of encoding. |
 The openssl command line is a
little complex to remember but if you are only interested
in finding the MD5 hashes of ISOs you have downloaded,
the job is now automatic. Newer versions of K3B have
automatic MD5 hash calculation built into the program so
when you load an ISO ready to burn, it does it for you.
You can then compare that with the site's image MD5
hashes file. The openssl command line is a
little complex to remember but if you are only interested
in finding the MD5 hashes of ISOs you have downloaded,
the job is now automatic. Newer versions of K3B have
automatic MD5 hash calculation built into the program so
when you load an ISO ready to burn, it does it for you.
You can then compare that with the site's image MD5
hashes file. |
 If you
need to calculate the MD5 hash for a file, the command
line for, say a file called 'myfile.txt' containing the
text 'hello world' on one line (a file length of 11
characters) would be...
If you
need to calculate the MD5 hash for a file, the command
line for, say a file called 'myfile.txt' containing the
text 'hello world' on one line (a file length of 11
characters) would be...Focussing Media Center
There is no doubt that in its own way, Media Center's wafting blue aurora-like backgrounds are pretty. However, they do take a lot of processing power. On one test PC, it took between 10 and 15 seconds to go from one still to another when in the screen on the right. This is just plain wasteful. So, here's how to change it. In Media Center, if you go into 'Tasks', 'Settings', 'General', 'Visual and Sound Effects', you should uncheck the boxes for 'Use transition animations' and 'Play sounds when navigating Windows Media Center'. In addition, select 'High contrast black' or 'High contrast white'. Save the settings and click on the 'Back' arrow button until you get to the original menu. If you didn't select one of the high contrast options, you would still be stuck with the animated blue aurora background and it would still take a long time to do even the simplest thing. However, with the high contrast version, you can see just how fast Windows Media Center can be - the 10 to 15 second wait is now down to less than a second - although it still does the annoying zooming/panning effect with stills when you use the slide show (it is as though your images are not worthy of looking at as a whole, they are there only as a trivial background for something else). If you just want to look at still images, you would probably be better off right-clicking on an image in Windows Explorer and selecting 'Open with...', 'Windows Photo Gallery'. |
 There is an argument
that instead of making itself look pretty whilst you
wait, it could instead, just get on with it so you don't
have to wait.
There is an argument
that instead of making itself look pretty whilst you
wait, it could instead, just get on with it so you don't
have to wait.Securing your dataWhen it comes to securing your data properly, your laptop's drive is where it all happens and where it all should stay. Essentially, you need some serious, bullet-proof disc encryption. BitLocker certainly isn't what we would call serious because it has a number of fundamental flaws:
In fact, there are some other vulnerabilities built in as well. The following is from Microsoft's TechNet site (click here to see the page in a new browser window)...
...so, with a bit of social engineering, the keys can be cleared from a machine that is somewhere else on the planet and therefore the data on the computer is effectively lost - although there is a recovery method that uses a manually keyed in number as a recovery password (anybody thought about manufacturing this situation so that TPM can be overridden - this is what many people would call a backdoor, albeit one with your own individual password). There are other attacks you can do on chips such as taking them out, using slow clock speeds and measuring the amount of current the chip takes. This can be done with smartcards to extract the keys so there is no reason why any suitable equipment shouldn't be able to do it here. In addition, even with the best intentions, it is possible to save a vital file on an unencrypted partition, only to be discovered by somebody when you lose the machine. Finally, with BitLocker, you are locked into using Windows which is often targeted by hackers and not necessarily the best option for you - see 'Choosing an OS' below - you need to consider how your data is stored (ie, the features of the file system used). If you want flexibility, you will want something that is OS independent - all of the encryption being done by the hard drive itself. That way, you can concentrate on getting a stable and usable OS - the hardware encryption is transparent to the OS and all of the disc is encrypted. In addition to this, you can use a bootloader to boot into two or more operating systems using this and, if the file systems are compatible (eg, Linux and Windows can both read them then they are both accessible).
There are a number of sizes and types and if you were wondering how good they are, they are CESG (Communications Electronics Security Group - HMG), DIPCOG (MoD) and FIPS validated and are in use by the department of defence in Australia, Europe, Canada and the USA. In fact, one of them is so secure that you need permission from the Government to use it. For high security versions of file/volume/disc encryption, software-based encryption has to be re-keyed every year (this can take up to 12 weeks) but by FlagStone being hardware-based (called the 'Basic'), you can leave it for five years. For the enterprise version, you don't need it to be re-keyed. |
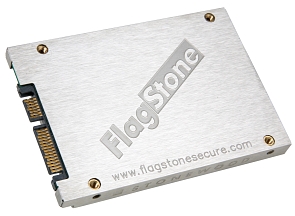 Stonewood
Electronics Ltd make a series of hard drives for laptops
and desktops. Physically, they are a direct replacement
for normal drives but these have a number of special
features including a tamper-evident body and true
hardware-encryption, -decryption, -key generation and
-key management. A 30GB FlagStone laptop drive will set
you back around £220.
Stonewood
Electronics Ltd make a series of hard drives for laptops
and desktops. Physically, they are a direct replacement
for normal drives but these have a number of special
features including a tamper-evident body and true
hardware-encryption, -decryption, -key generation and
-key management. A 30GB FlagStone laptop drive will set
you back around £220.PXE bootIt might be that your laptop has, in addition to the option at boot time of pressing [F2] (to go into the BIOS editing screen), pressing [F12] to PXE boot the machine. So, what is a PXE boot and could it be useful?
Also, instead of using a PC (arguably a 'fat client' because of all of the extra processing ability it possesses), you can use a genuinely thin client with few resources and have the central server do almost all of the processing for it. As a matter of interest, Sun Microsystems' thin client only takes 4 watts. In addition to this, you can also use PXE for
installing OSes from a central server and is a lot easier
than you might at first think. Here is OpenBSD as an
example of what you need to do... |
With everything in place, you can now boot up the machine in question, press [F12] and then any BIOS password you might need. Next, it sends out a DHCP Discover packet, the following sequence of which gives it its IP address and tells it which file to load. '/srv/tftpboot/pxeboot' is then transferred across your LAN and executed. This then makes the machine load the bsd kernel (having first tried to find '/etc/boot.conf' and failed to find it - this is effectively '/srv/tftpboot/etc/boot.conf' because the server uses /srv/tftpboot as its root because we specified it in the command line). Next, you can install OpenBSD via your LAN. |
 PXE stands for
Preboot Execution Environment (okay, so 'Execution'
starts with an 'E' but the people who assemble acronyms
like the letter 'X' more and besides, if it wasn't the
'X', it would be a 'PEE' boot, thus allowing for comments
during booting such as 'my computer is peeing at the
moment'. So, let's stick with the 'X'). Any way, it
allows the machine in question to boot across a network
and is normally used by thin clients (diskless machines
that use the server for file storage). It has the
advantage that you can run any operating system on a thin
client from Linux and UNIX to Windows.
PXE stands for
Preboot Execution Environment (okay, so 'Execution'
starts with an 'E' but the people who assemble acronyms
like the letter 'X' more and besides, if it wasn't the
'X', it would be a 'PEE' boot, thus allowing for comments
during booting such as 'my computer is peeing at the
moment'. So, let's stick with the 'X'). Any way, it
allows the machine in question to boot across a network
and is normally used by thin clients (diskless machines
that use the server for file storage). It has the
advantage that you can run any operating system on a thin
client from Linux and UNIX to Windows.Choosing an OS
The data, we are continually being told, is worth more than the computer so we need to look after it. Keeping it secured on the hard drive is one thing (see 'Securing your data' above) but when we encounter accidents such as power loss, we need to know that the data is in a known state. Financial and stock transaction systems, for example,
only work if you know that money or goods that has been
removed from one place has been allocated to another. If
a power loss occurs during this reallocation, you could
end up with money or goods either being in two places or
being lost all together. The solution to this is
journalling. |
 With a journalled system, data is written to
the disc and only when the data transfer is completed is
the state of the disc updated. Booting after a dirty
shutdown makes the system replay any outstanding
transactions so that only completed data transfers and
their metadata exist. Some systems perform metadata-only
journalling which is a bit faster but whilst affected
files look the right size, they don't contain your data. With a journalled system, data is written to
the disc and only when the data transfer is completed is
the state of the disc updated. Booting after a dirty
shutdown makes the system replay any outstanding
transactions so that only completed data transfers and
their metadata exist. Some systems perform metadata-only
journalling which is a bit faster but whilst affected
files look the right size, they don't contain your data.Microsoft's NTFS does metadata-only journalling (although it tries to save everything as metadata) whereas Linux's ReiserFS (post-2.6.8 kernel) and Sun Microsystem's ZFS (Solaris) are all block journalling systems. Replaying a journal following a dirty shutdown only takes a few seconds and with block journalling, you know that the data will be there as well. The current versions of SUSE Linux (10.2 see upper screenshot) and OpenSolaris 10 (see lower screenshot) give you these, have good desktop/laptop environments and good, fully functional, MS Office compatible office suites. In addition, they are free or you can pay for support. Also, you know that in an emergency, you can just pull the plug on it and it will be all right when you reboot. |
 Many
people - it seems - choose an OS by how good it looks (or
rather, how good the GUI looks). Whilst a reasonable GUI
is clearly important, it is not the only thing to think
of. You have to look at how easily the target user
population is going to take to it although, one thing to
consider when thinking about this is that studies have
been done with the old XP GUI and various UNIX systems
GUIs (such as those on Linux) and it was found that they
were all just as easy to use as each other so, maybe the
GUI isn't really that important at all.
Many
people - it seems - choose an OS by how good it looks (or
rather, how good the GUI looks). Whilst a reasonable GUI
is clearly important, it is not the only thing to think
of. You have to look at how easily the target user
population is going to take to it although, one thing to
consider when thinking about this is that studies have
been done with the old XP GUI and various UNIX systems
GUIs (such as those on Linux) and it was found that they
were all just as easy to use as each other so, maybe the
GUI isn't really that important at all.