PC Plus HelpDesk - issue 246
This month, Paul Grosse gives you more insight into
some of the topics dealt with in HelpDesk
|
 |
HelpDesk
Linux window decorations and other interface featuresKDE (which runs on various flavours of UNIX, Linux and the BSDs) is particularly flexible in the way that it interfaces with the user. It can be made to have much of the look and feel of various types of Windows and Mac interfaces. However, where in Windows, you change between various GUI styles (in XP, that's blue, green and silver or over to the processor lighter Windows 98 look), there are actually two parts to the interface that are quite easy to confuse. First of all, there are the window decorations (the title bar with its label, icon and buttons and the borders - effectively the 'bits' around the outside) and then there are the other parts of the windows (the form background, buttons and other objects and so on). In Windows, they are separate and if you have had the right type of crash in Windows XP, you will have seen either that the window decorations fail but the rest of the system keeps on working or, that the program crashes and the window decorations keep on working. These two types of crash are the only time that you might think that the two are separate. In KDE and other UNIX-like-environment GUIs, you will see that they are separate and that you can change them independently of each other. So, let's go through some of the different aspects of the GUI and see how we can change them and what we can do with them. |
 First of
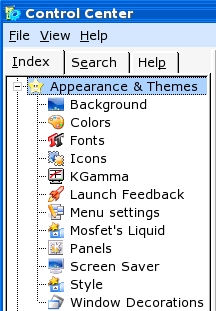
all, fire up control centre and click on 'Appearance
& Themes'. First of
all, fire up control centre and click on 'Appearance
& Themes'.Here, you will find many different sets of options that you can play around with - if giving Windows 95 users the choice of changing colours and fonts for that interface wasted millions of man-hours, this is going for the record. The ones that we are primarily concerned with here are:
|
Window DecorationsSelection
You can select one and either see a preview of it or, failing that, click on the 'Apply' button in the bottom right hand corner. |
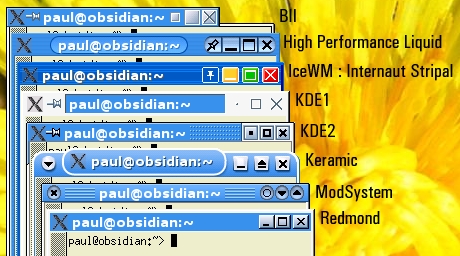 This is a
composite (it would have to be) of some of the window
decorations that are available. This is a
composite (it would have to be) of some of the window
decorations that are available.You can see that the close button is (in these cases at least) always a cross and the minimize and maximize buttons always indicate their meaning. You will also notice that there is another button (apart from the menu button) that looks like a notice board pin or a circle (usually). This is the sticky (or depth) button and it is a toggle (that is to say that click on it once and it turns on: click on it again to turn it off). This button allows a window to appear on all of the desktops simultaneously which, as you get used to the idea that a GUI need not be claustrophobic, might well become increasingly useful (depending upon what sort of work you are doing). |
 The Ice
Window Manager (IceWM) is a proper window manager in its
own right but SUSE (and probably others as well) allow it
to be part of KDE. The Ice
Window Manager (IceWM) is a proper window manager in its
own right but SUSE (and probably others as well) allow it
to be part of KDE.You can download IceWM themes or write your own (see HelpDesk in issue 208 for more details on how to make your own) and use them on your system. If you want a Windows XP version, you can either find one to download or take screen shots (one with an active window and one with an inactive window) and make your own XP theme from that. |
Aqua and Button Positions
|
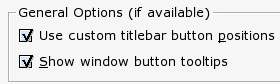 At the
bottom of the General tab sheet, you have some general
options. If you click on 'Use custom titlebar button
positions', you will be able to use the 'Buttons' tab. At the
bottom of the General tab sheet, you have some general
options. If you click on 'Use custom titlebar button
positions', you will be able to use the 'Buttons' tab. |
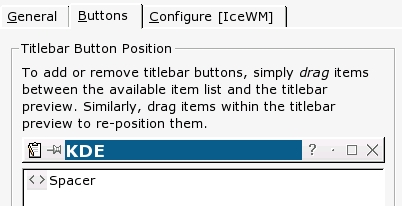 Under the
'Buttons' tab, you can now drag and drop the titlebar
buttons to where you want them. Under the
'Buttons' tab, you can now drag and drop the titlebar
buttons to where you want them.In this screenshot, from left to right they are: menu; depth/sticky; help; minimize; maximize; and, close. |
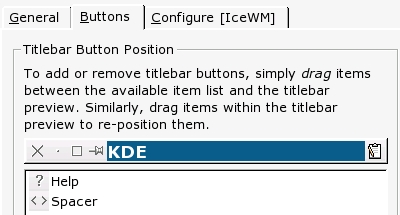 To change
them around, all you need to do is to drag and drop them. To change
them around, all you need to do is to drag and drop them.Here, I've made the order: close; minimize; maximize; sticky; and, on the right: 'menu'. Of course, on Mac's Aqua interface, there is no sticky button because there is only one desktop. However, on the Aqua interface the buttons are red, yellow and green so it seems obvious to have a blue one to make a pretty rainbow (of sorts). |
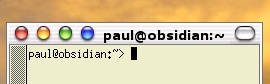 And, here
it is: red for close; yellow for minimize; green for
maximize; and, blue for sticky. A lot prettier than the
Aqua interface. And, here
it is: red for close; yellow for minimize; green for
maximize; and, blue for sticky. A lot prettier than the
Aqua interface. |
Double-clicking on the title bar
However, if your user population uses the titlebar-double-click to maximize their windows, you can reconfigure this... |
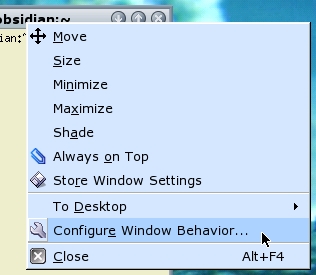 Right-click
on the titlebar and you will get a menu similar to this. Right-click
on the titlebar and you will get a menu similar to this.Click on 'Configure Window Behaviour...'. |
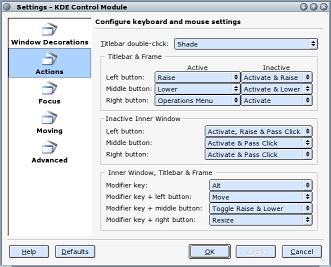 You will
now get a form like this one - you can see that this is a
lot more configurable than Windows. The Windows
decorations dialogue is the form that we have already
used to select a windows decoration but we want
'Actions'. You will
now get a form like this one - you can see that this is a
lot more configurable than Windows. The Windows
decorations dialogue is the form that we have already
used to select a windows decoration but we want
'Actions'.At the top, there is the 'Titlebar double-click:' dropdown box. |
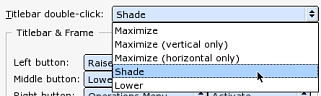 Click on
that and you will get a choice similar to that on the
right. To change to maximize, select maximize and when
you click on 'Apply' or 'OK', the behaviour will be the
same as in Windows. Click on
that and you will get a choice similar to that on the
right. To change to maximize, select maximize and when
you click on 'Apply' or 'OK', the behaviour will be the
same as in Windows. |
|
|
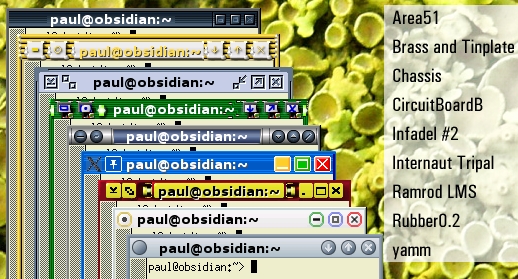
 In the
'Widget Style' list box, you can see a list of all of the
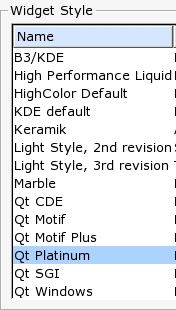
styles that you can choose from. In the
'Widget Style' list box, you can see a list of all of the
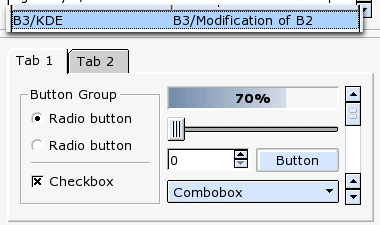
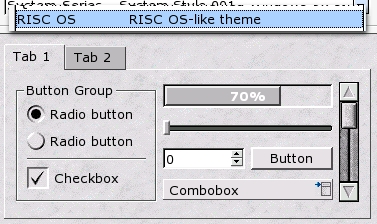
styles that you can choose from.There are quite a few and if you are trying to get an interface that is fairly close to the one that your user population is used to, you should be able to achieve this. Here are some of the different choices that you have... |
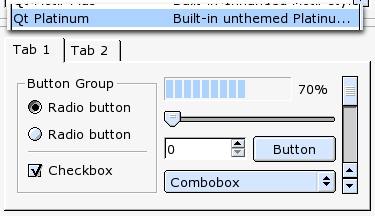 As you
look down the column of different styles on the right,
one thing that you will notice is that the controls all
look pretty much the same as each other. As you
look down the column of different styles on the right,
one thing that you will notice is that the controls all
look pretty much the same as each other. |
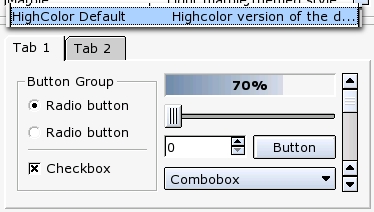
 The
sliders all have a track of some sort with a button or
knob on it; The radio buttons all have the same general
appearance as each other as do the check boxes. The
sliders all have a track of some sort with a button or
knob on it; The radio buttons all have the same general
appearance as each other as do the check boxes. |
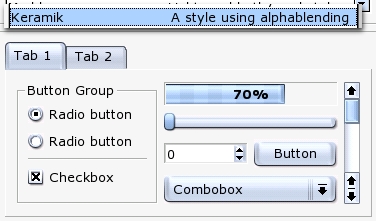
 The end
users can see how these work on these interfaces just as
easily as they can see them on Mac OS X or on Windows -
there is no effective difference. The end
users can see how these work on these interfaces just as
easily as they can see them on Mac OS X or on Windows -
there is no effective difference. |
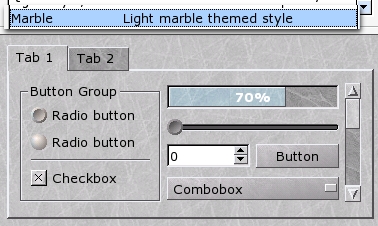
 Users who
are new to computers take just as long to get used to the
KDE interfaces as they do to get used to the proprietary
ones. Users who
are new to computers take just as long to get used to the
KDE interfaces as they do to get used to the proprietary
ones. |
 |
 |
 |
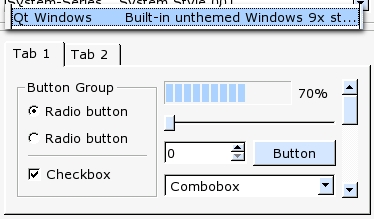 This
penultimate example down the right hand side is Qt
Windows which is a fairly good representation of a
Windows 95/98 interface. This
penultimate example down the right hand side is Qt
Windows which is a fairly good representation of a
Windows 95/98 interface. |
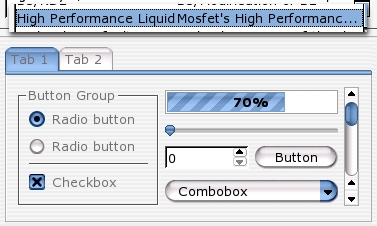 This last
example is Mosfet's aqua interface which should satisfy
those nervous about upgrading from a Mac environment. This last
example is Mosfet's aqua interface which should satisfy
those nervous about upgrading from a Mac environment. |
| If you think that that lot is all rather blue, carry on reading... |
|
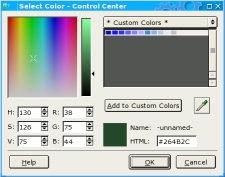 Just
choose a colour in the usual way and click on 'OK'. Just
choose a colour in the usual way and click on 'OK'.You can take a screenshot or use an image and then use the colour picker to take a sample of any specific colour you need. |
|
| From left to right: KMenu; SuSE work menu; documents directory; code editor, image editor, text editor, command shell, file manager; browser; email program; system monitor (CPU usage, physical memory, swap space), pager (display of what is on each desktop); clipboard program; and, clock (if you click on it, you get a calendar). In addition to this one (which goes at the bottom in the middle, I also have two others (one on the left and one on the right) and a taskbar (list of program windows running in the GUI on my account) |
 |
|
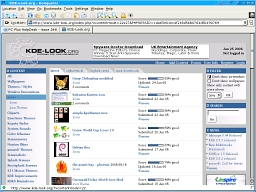 This
is KDE Look org's site - there's always plenty going on
there. This
is KDE Look org's site - there's always plenty going on
there. |
|
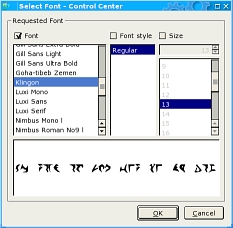 Of course,
there is nothing to stop you using a 16th Century Italian
Cursive font, Gill Sans Serif, Times or even Klingon (if
you have the localisation set for it). Of course,
there is nothing to stop you using a 16th Century Italian
Cursive font, Gill Sans Serif, Times or even Klingon (if
you have the localisation set for it).qo'mey poSmoH Hol
|
|
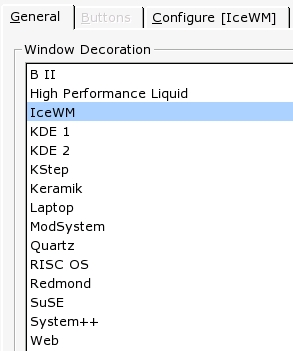 Under
Window Decoration, you will get a list similar to that on
the right (under the 'General' tab).
Under
Window Decoration, you will get a list similar to that on
the right (under the 'General' tab).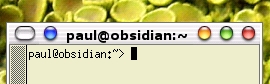 If you
select a theme that looks a little like the Mac OS X Aqua
interface (say you are upgrading from the Macintosh
proprietary environment and want your user population to
feel reasonably at home), you will undoubtedly use the
IceWM: Aqua theme or something similar. You will,
however, notice that the buttons are in the wrong places.
This is quite easy to solve...
If you
select a theme that looks a little like the Mac OS X Aqua
interface (say you are upgrading from the Macintosh
proprietary environment and want your user population to
feel reasonably at home), you will undoubtedly use the
IceWM: Aqua theme or something similar. You will,
however, notice that the buttons are in the wrong places.
This is quite easy to solve...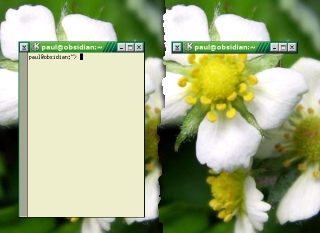 One
difference between Windows and KDE is what happens if you
double-click on the title bar. In Windows, the window
will maximize but in KDE, it will shade. You can see from
the two screenshots on the right that this is like
grabbing hold of the bottom edge and dragging it all of
the way up to the title bar in Windows. However, this is
better than that in that if you double-click on it again,
it goes back to its original size.
One
difference between Windows and KDE is what happens if you
double-click on the title bar. In Windows, the window
will maximize but in KDE, it will shade. You can see from
the two screenshots on the right that this is like
grabbing hold of the bottom edge and dragging it all of
the way up to the title bar in Windows. However, this is
better than that in that if you double-click on it again,
it goes back to its original size.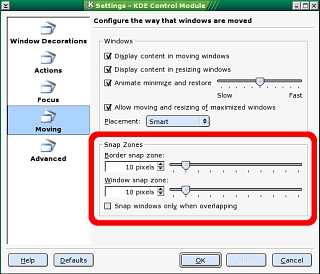 More...
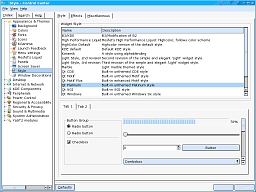 Style
Style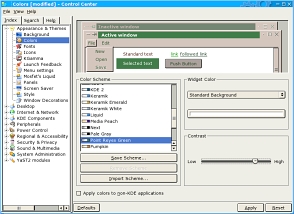 Colours
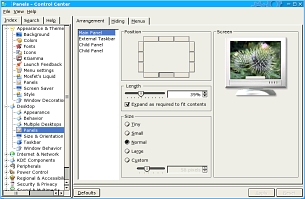 Panels
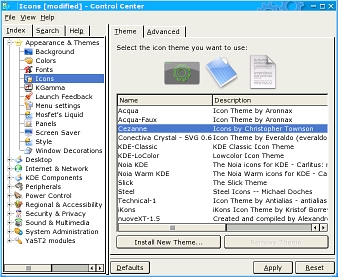 Icons
Icons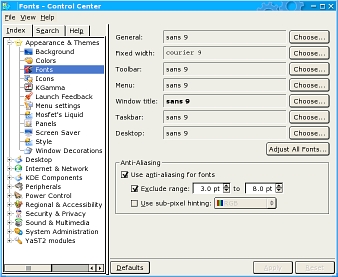 Fonts
Fonts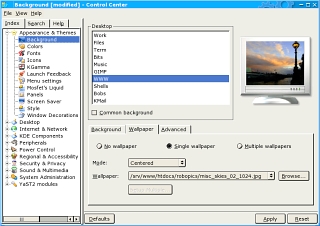 Backgrounds
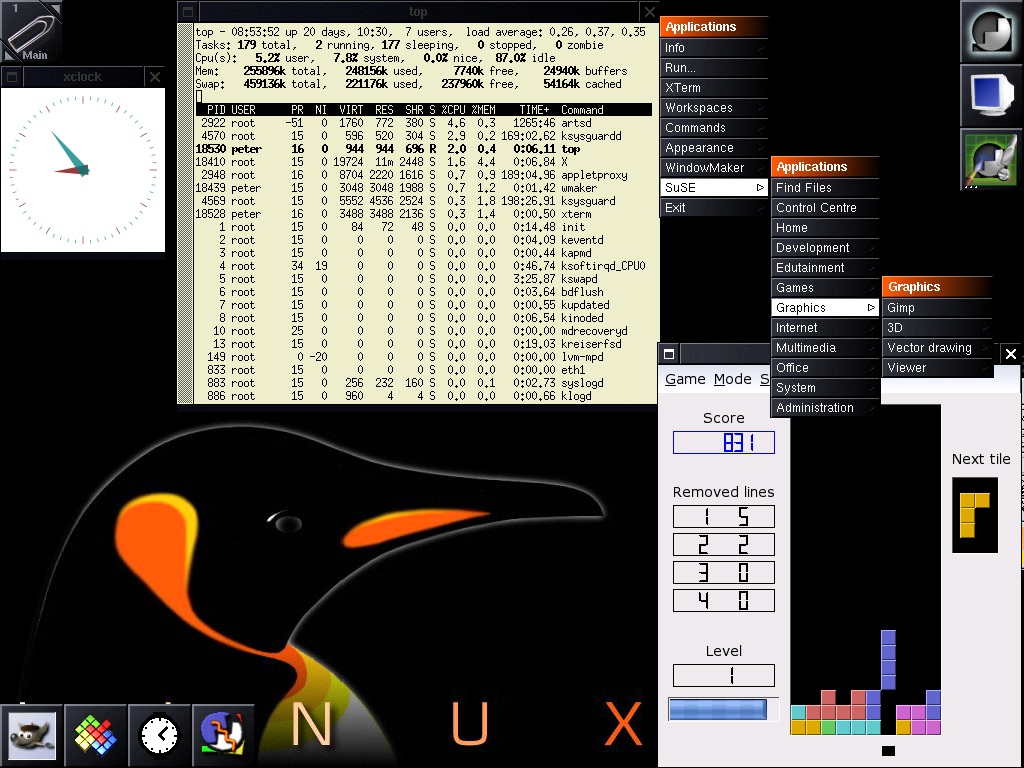
Other GUIs on Linux/BSD/UNIXKDE is not the only window manager that will run on UNIX-like systems. Choosing one depends upon various criteria such as how confident your users are, how much memory you have to play with (remember that Linux and other UNIX-like OSes will run on a fraction of what Windows XP needs to run on), the speed of the machine (again, you can run the OS on quite a low spec machine compared to Windows XP), how much disc space you have and so on. (Note... click on any of the images on the right to display a 1024x768 version in a new window) |
|
|
|
|
|
|
|
Google Maps and browser compatibility
However, Google Maps needs your browser to be able to play a few tricks and not having scripts will break it. Also not having an as up-to-date as required JavaScript interpreter will also break Google Maps. There are a lot of different browsers out there and as this relies upon more than just standardised HTML to run on, the number of browsers that are supported is limited. A plug-in is not the answer until Google Maps becomes stable (ie, gets out of 'beta') and you would essentially have to update the plug-in each time Google changed anything. So, which browsers does it support? If you look at http://maps.google.co.uk/support/bin/answer.py?answer=16532, you will see that (at the time of writing) it says... |
|
|
|
| Ideally, your best bet is to install one of those browsers. |

Proxy your web server - domain names on LANIf you have a web server on your LAN and the server is visible from the Internet, you will have a route from your firewall to your server. If you are running Apache or some other, easy-to-configure web server, you might have multiple virtual hosts as well. But how do you make sure that they are all working properly? |
 If the server acts as a bridge to the
Internet - that is, you have only one machine acting as a
filter and server - your LAN machines will have access to
it via its IP address or the machine name. If the server acts as a bridge to the
Internet - that is, you have only one machine acting as a
filter and server - your LAN machines will have access to
it via its IP address or the machine name.External users connect to the Domain Name Server (DNS) which gives them the IP address of your firewall and the request is then routed to your server. The problem is that if you use one of your domain names, your browser will ask the external DNS and you will get your firewall's external IP address and the process will most likely fail. If you have your own, internal DNS, the solution is to have an entry in it with the address of the server linked to the domain names it uses. However, if you have not got your own, internal DNS, you cannot do this. Also, putting the domain names in the 'hosts' file doesn't always work. |
 Alternatively, if your server is in the DMZ,
you will have a route to that from the LAN but again, the
DNS points at the external address on the firewall. Alternatively, if your server is in the DMZ,
you will have a route to that from the LAN but again, the
DNS points at the external address on the firewall.
So, this is for people who either don't have a DNS of their own that they can play around with, don't have the time, or, are too lazy. |
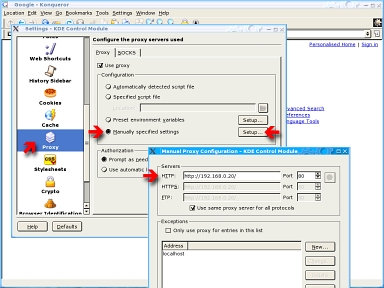 One way of doing this is to go into your
browser's configuration panel (here, Konqueror's) and
change the proxy configuration so that instead of looking
at the proxy (in the first of the two diagrams above,
that would be 10.12.216.254 and on port 8080, 3128 or
similar), it looked at the external NIC (in this case,
192.168.0.20) on port 80. One way of doing this is to go into your
browser's configuration panel (here, Konqueror's) and
change the proxy configuration so that instead of looking
at the proxy (in the first of the two diagrams above,
that would be 10.12.216.254 and on port 8080, 3128 or
similar), it looked at the external NIC (in this case,
192.168.0.20) on port 80.That way, you can type in the URL and the server will give back the page from the virtual server that you want. |
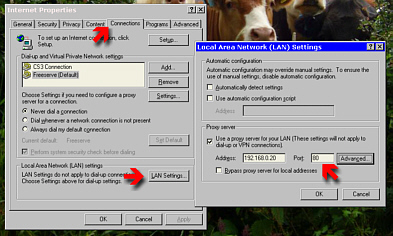 This is on Internet Explorer 6 running on
Windows 98SE. This is on Internet Explorer 6 running on
Windows 98SE.In the second case (where the server is running on the DMZ), you would again look on 192.168.0.20 on port 80 although here, there would be no proxy for normal use (you can always have one on your LAN and run your web server on a DMZ). However, the problem is that changing the browser configuration and then changing it back afterwards is quite a lot of hassle. If you just want to check that changes to links and file references work all right, you could do with a quicker, temporary solution - one that you don't have to undo afterwards. |
 Links is one browser that you can change at
the command line. If you use the -http-proxy switch along
with an address and port number in the form a.b.c.d:p
where p is the port number. Links is one browser that you can change at
the command line. If you use the -http-proxy switch along
with an address and port number in the form a.b.c.d:p
where p is the port number.You can see the full command line in the example on the right... |
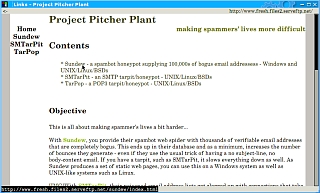 And here it is in action. And here it is in action.This is not the default virtual host on the server but using links like this checks that all of the file links work all right. |
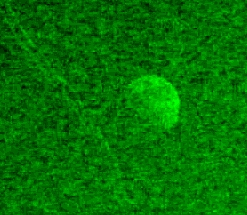
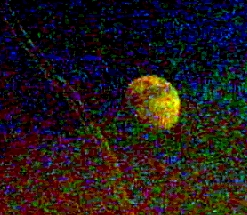
Expanding image density rangeIn theory, you can take an image of the moon that has been taken during daylight and cancel out the light from the sky - this is effectively just an extrapolation of what happens at night except that the amount of light from the sky is a lot less at night so you don't notice it. |
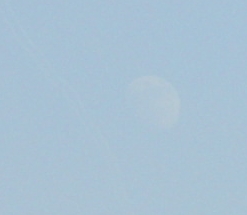 In fact,
your eyes take out a lot of the light if you look at the
moon during the day. The magnitude of the light during
daylight only really makes itself apparent when you use a
device like a camera - this not having advanced image
(edge detection) processing built into the image before
it is passed on (in the case of the eye: to the brain, in
the case of a camera: to the memory chip). In fact,
your eyes take out a lot of the light if you look at the
moon during the day. The magnitude of the light during
daylight only really makes itself apparent when you use a
device like a camera - this not having advanced image
(edge detection) processing built into the image before
it is passed on (in the case of the eye: to the brain, in
the case of a camera: to the memory chip).In the image on the right, you will just about be able to make out the moon. |
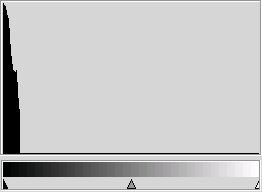
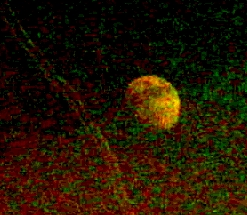
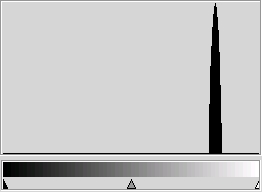 Here is
why it is so difficult to see. There are only 13 levels
of density (value) that represent the image of the moon. Here is
why it is so difficult to see. There are only 13 levels
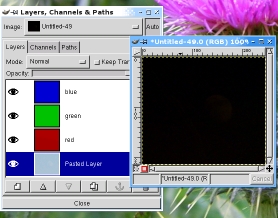
of density (value) that represent the image of the moon.We can go to each layer (red, green and blue) one at a time and expand the left and right density markers so that they match the densities of each layer in turn. |
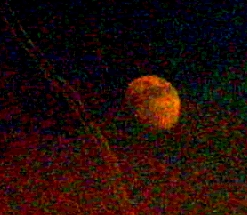
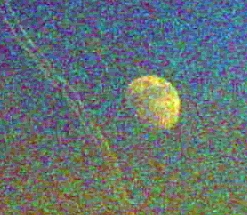 If you do
that, you will get an image like the one on the right. If you do
that, you will get an image like the one on the right.The first thing you will notice (assuming that we are ignoring the contrail that has become apparent - East Midlands Airport was downwind of the place that this was taken from so aircraft were flying towards me) is that there is a lot of noise in the image. This is due to the fact that we have expanded such a short range of densities to cover the full range in this photograph. Another thing to notice is that we haven't cancelled out the blue sky either. Let's look at where this noise is coming from and see if we can do anything about reducing the level of background 'blueness'. |
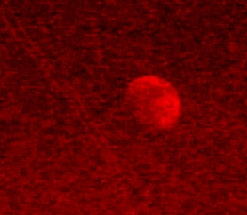 This is
the red part of the image. The sky is blue so in the red
layer, the sky is darkest. This is
the red part of the image. The sky is blue so in the red
layer, the sky is darkest. |
 You can
see that the sky is a lot lighter here and in comparison,
the contrast between the moon and the sky is a lot less. You can
see that the sky is a lot lighter here and in comparison,
the contrast between the moon and the sky is a lot less. |
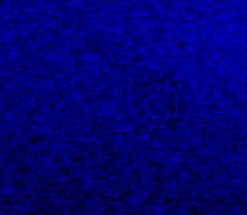 Here,
there appears to be little if any difference between the
sky and the moon. If you were presented with just this
image, you might think that there is something like a
section of a round object there - from the way that the
JPEG image changes the noise in it at the moon's limb. Here,
there appears to be little if any difference between the
sky and the moon. If you were presented with just this
image, you might think that there is something like a
section of a round object there - from the way that the
JPEG image changes the noise in it at the moon's limb. |
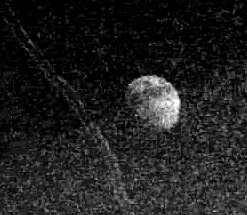
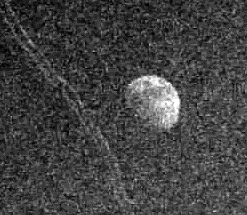 This is
the monochrome image derived from the red and green
images but you can still see a lot of background light
from the sky. This is
the monochrome image derived from the red and green
images but you can still see a lot of background light
from the sky.However, you will notice that this is a gradient. The sky produces a gradient but taking a value away from the whole image is like taking a flat colour from the image. So, let's try taking values and then subtracting gradients from the image. |
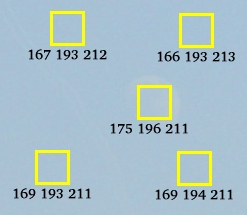 Here are
the values (R, G, B) for each of five areas. These are
taken as an average over a 32x32 pixel block for areas
either side of the moon and just to be complete, we have
taken one for the moon as well to demonstrate just how
little it stands out. Here are
the values (R, G, B) for each of five areas. These are
taken as an average over a 32x32 pixel block for areas
either side of the moon and just to be complete, we have
taken one for the moon as well to demonstrate just how
little it stands out. |
 Here, I've
added three gradients in the rough direction of each of
the red, green and blue layers in the image above. Here, I've
added three gradients in the rough direction of each of
the red, green and blue layers in the image above.The reason I have used full range gradients is so that I can see where they are. |
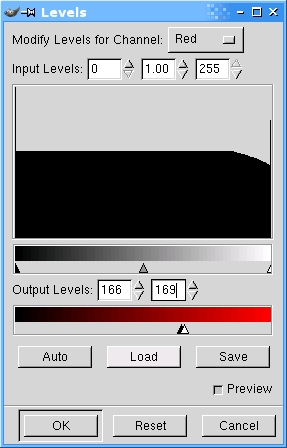 Now, we
narrow the range for each colour so that it has the
correct limits - the limits for the sky, not the sample
from the moon. Now, we
narrow the range for each colour so that it has the
correct limits - the limits for the sky, not the sample
from the moon.You can see how narrow they are by looking at the output limits (166 to 169, ie it has a range of four values). |
 Here, you
can see that each gradient looks fairly flat. Here, you
can see that each gradient looks fairly flat.Now, the image has all of the right amounts taken off it (well, as best we can do considering the image in the first place). You can see that it looks black. |
 And here
is why. We need to expand this up to the full range. And here
is why. We need to expand this up to the full range. |
 Here it is
with the values expanded. Here it is
with the values expanded. |
 This has
each layer expanded so that the blue in the image reaches
a maximum as well as the red and green in the image
(remember that there was no appreciable detail in the
blue layer). This has
each layer expanded so that the blue in the image reaches
a maximum as well as the red and green in the image
(remember that there was no appreciable detail in the
blue layer). |
 Again, if
we want to make a monochrome image, we can get rid of the
blue Again, if
we want to make a monochrome image, we can get rid of the
blue |
 and then
make it a grey scale image. and then
make it a grey scale image.Note that here, there is still a gradient of background noise although this appears to be a step - this happens when you have a gradient over a small density range. One way of getting rid of this is to start off by expanding the density range of the image so that it is a lot wider than the original. If you do this, when you subtract a gradient from it, you will have more steps and if they are fine enough, you will not see any steps (or at least, not very easily) when you put the gradient in. This is an artefact of only having 8 bits per layer per pixel - if it was 16 and RAW, there would be no JPEG artefacts and the lower limit to the dynamic range would be defined by the sensor instead of the image file format used (remember that these cameras are designed so that people with little understanding of computers can process the images on a Windows PC). |
Using 'time' on Linux
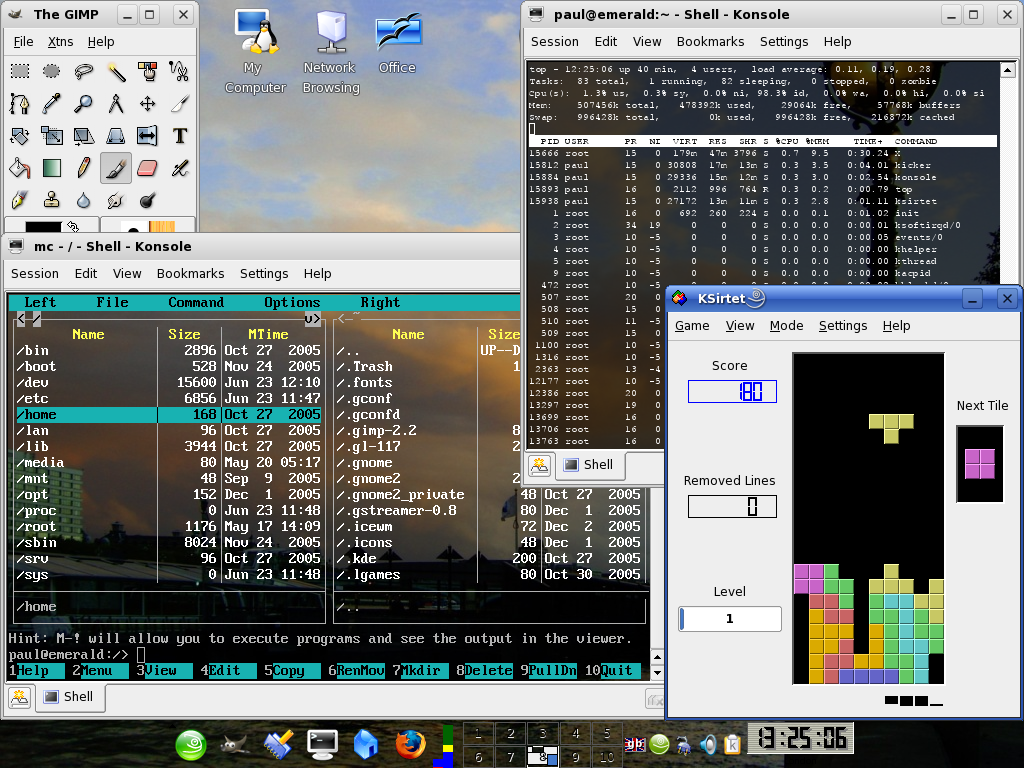
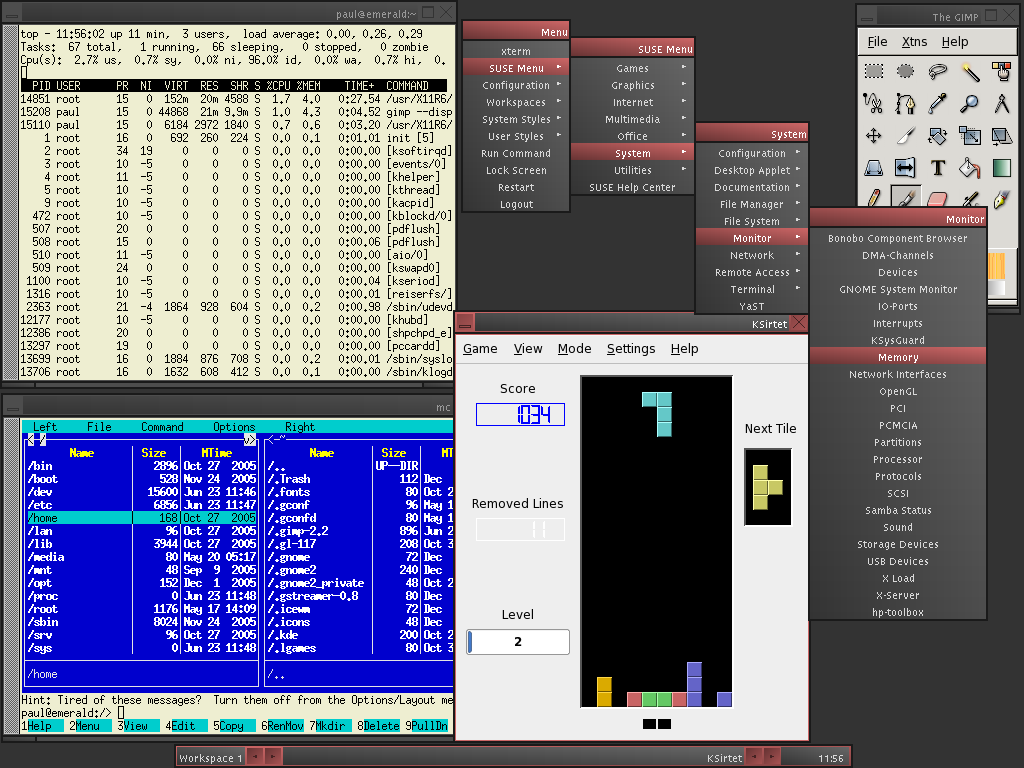
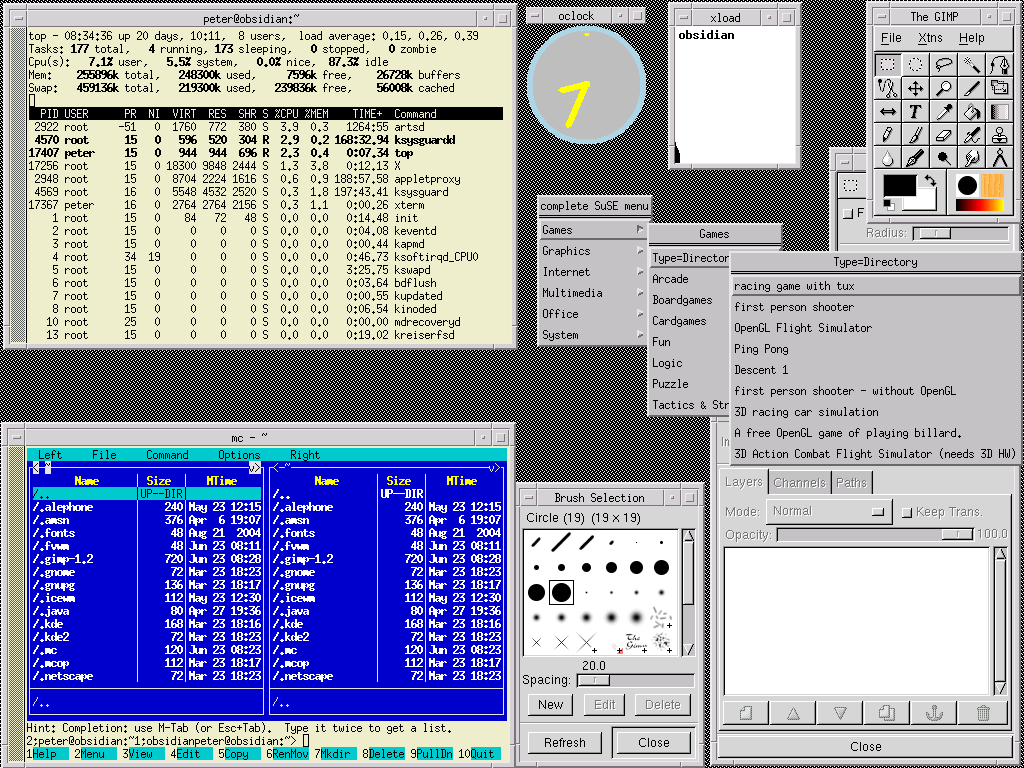
Here, we are looking at ksirtet which is a tetris game for KDE. We can see it (PID 22146) and that it has used a total of 2.59 seconds of time. However, top give you the data from the process as it runs. We can get more information about the process once it has finished. |
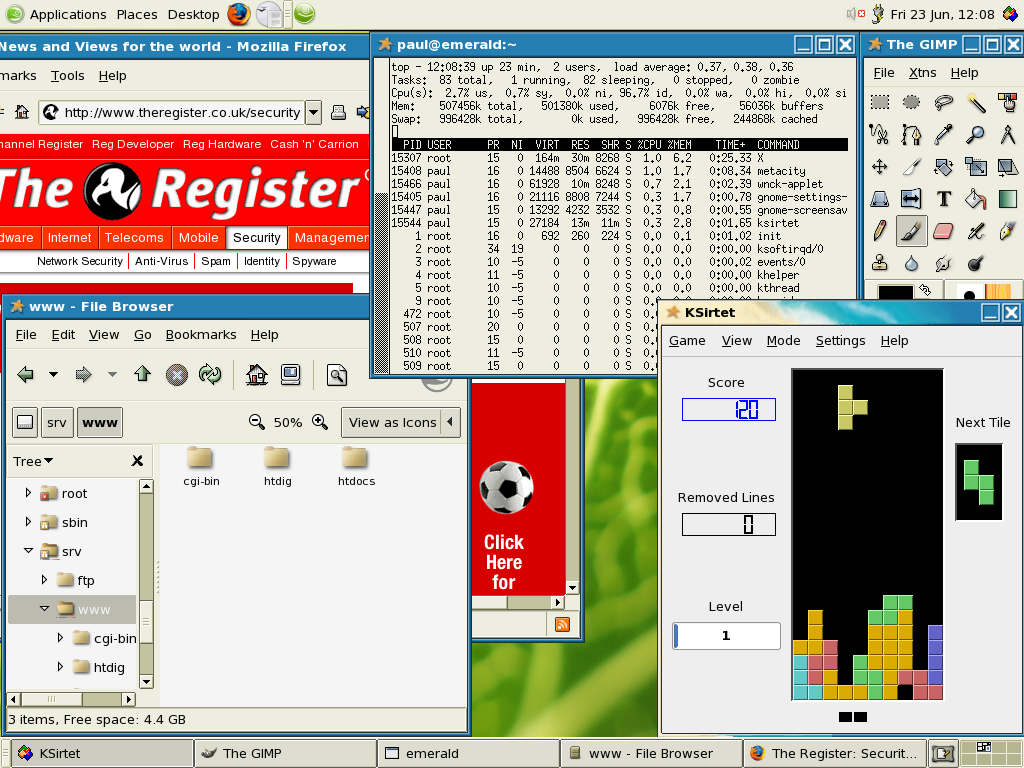
 In the
ksirtet program above, I launched it using a program
called 'time'. In the
ksirtet program above, I launched it using a program
called 'time'.Once ksirtet has finished, time prints out the total elapsed time that the program has run from when it started to when it finished (in this case, 393.62 seconds or 6m33.62s), the amount of user time (2.44s) and the amount of system time (0.34s). If you add up these last two times, you get 2.78s which is reflected in the time that top came up with when it was running. 'top' has the advantage that you can see what a program is doing in real time but it has the disadvantage that you cannot interrogate the system once a process has finished. On the other hand, 'time' only tells you what happened once the process has finished. |
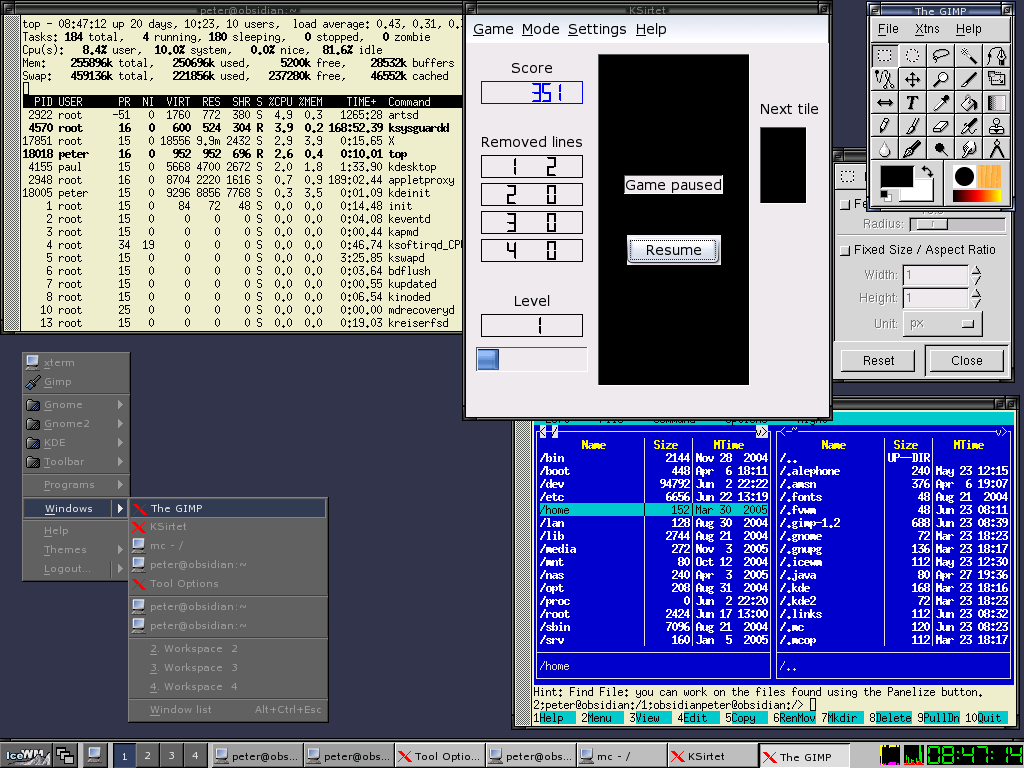
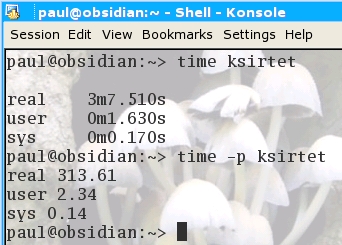 Just in
case you wondered what the '-p' switch was about, it
makes the output conform to a portable operating system
interface (POSIX) standard. Just in
case you wondered what the '-p' switch was about, it
makes the output conform to a portable operating system
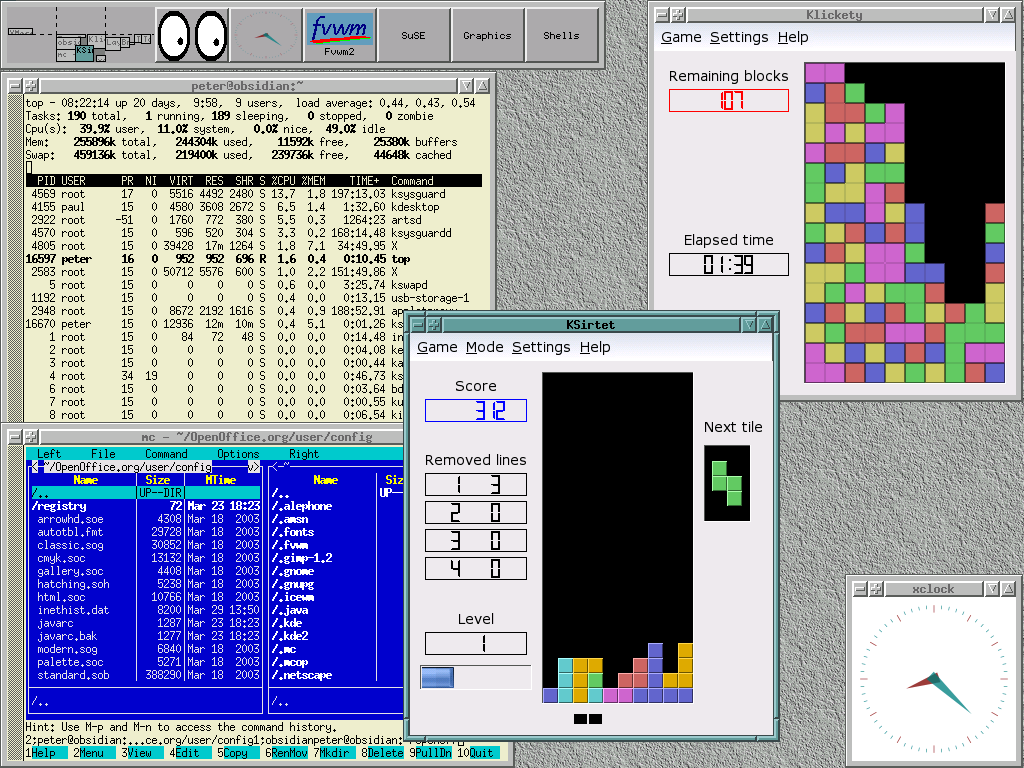
interface (POSIX) standard.On the right, you can see the output of a game of tetris without the -p switch and another game with it. |
 It is
possible to find out what proportion of the system's
resources is used by a particular program by using top.
It is
possible to find out what proportion of the system's
resources is used by a particular program by using top.Removing motion blur at sourceThere are many different effects that you can use to 'enhance' a photograph but the best photographs are those that were good to start with - even before the image was consigned to the camera's memory. |
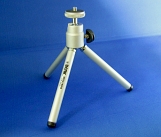 If you are
out in the middle of nowhere and you have your trusty
camera with you, you might not have any definite plans to
take any pictures - just taking it along with you in the
extremely rare case that you need to capture the moment
when the Zeta Reticuleans land for their buckwheat
pancakes or that butterfly you think might be almost as
alien needs a photograph taking of it ... or whatever. If you are
out in the middle of nowhere and you have your trusty
camera with you, you might not have any definite plans to
take any pictures - just taking it along with you in the
extremely rare case that you need to capture the moment
when the Zeta Reticuleans land for their buckwheat
pancakes or that butterfly you think might be almost as
alien needs a photograph taking of it ... or whatever.Any way, you might take a small tripod with you like the one on the right so that if the light levels are low, you can at least have some chance of taking a photograph without any great amount of blur. |
 However,
these tripods are rather light and even with a small
camera, they are a bit wobbly. However,
these tripods are rather light and even with a small
camera, they are a bit wobbly.The image on the right is some bird seed taken close up in low light levels. As a result, the camera is still moving as I take my finger off the shutter release (maybe 'push button' would be more appropriate as there is no shutter to release). |
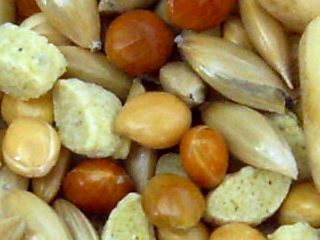 Here, you
can see the result of using a delayed shutter release. In
this case, it was 2 seconds - the shortest that this
camera has. The image is a lot clearer and you can now
see that this is bird seed. Here, you
can see the result of using a delayed shutter release. In
this case, it was 2 seconds - the shortest that this
camera has. The image is a lot clearer and you can now
see that this is bird seed.The seeds are around 1.5mm across and you can see the that they are in fact quite shiny. |
System monitoring on Windows 98If you are going to use your Windows 98 box for network- or file-storage-related activities, you might want to keep an eye on what it is up to. You can do this using its System Monitor program. Look under 'Start', 'Programs', 'Accessories', 'System Tools', 'System Monitor' or similar - you might well have moved it since you got the machine.
|
 Once you
have it going, you need to add some charts to it. Once you
have it going, you need to add some charts to it.Click on 'Edit', 'Add Item...' |
 Next, you
see the 'Add Item' dialogue box. Next, you
see the 'Add Item' dialogue box.Click on the categories on the left and the items will appear in the list on the right. You can highlight more than one item at a time by holding down [Ctrl] whilst clicking on the items. However, this only works one category at a time. Once you have finished, click on 'OK'. |
 After a
while, it will look similar to the screenshot on the
right. After a
while, it will look similar to the screenshot on the
right.There are plenty of controls to play around with and you will soon get a feel for which ones are of use to you. You can alter the update interval quite easily by clicking on 'Options', 'Chart...'. The slider takes you through 1, 3, 5, 10, 30 seconds, 1, 5, 10 minutes and 1 hour. When you close the program, the items that you selected will be saved and next time you load the program, they will be there again. |
 If you
cannot find it there and have no idea if it the link is
even on the machine, look under 'C:Windows\' for
'Sysmon.exe'. When you have located it, right-click on it
and select 'Create Shortcut'. Next, drag the shortcut
into your 'Start' menu and drop it where you want it to
go.
If you
cannot find it there and have no idea if it the link is
even on the machine, look under 'C:Windows\' for
'Sysmon.exe'. When you have located it, right-click on it
and select 'Create Shortcut'. Next, drag the shortcut
into your 'Start' menu and drop it where you want it to
go.Adding a program to the panel in KDESometimes you cannot find just the executable you want on the KDE panel. Maybe it's because it is hidden away and you don't know exactly where it is, or maybe it is a program that you have installed or have written yourself. Any way, this is what you need to do to add a program icon to the panel in KDE... |
 First of
all, right-click anywhere on the icon populated part of
the panel (not menus) or, if your panel is not overly
full, on a blank bit of panel. First of
all, right-click anywhere on the icon populated part of
the panel (not menus) or, if your panel is not overly
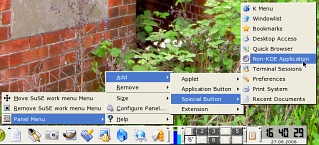
full, on a blank bit of panel.Click on 'Panel Menu', 'Add', 'Special Button', 'Non-KDE Application'. |
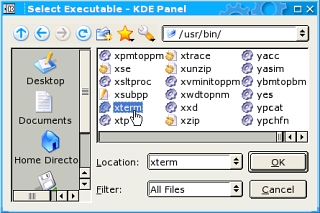 You next
get this dialogue box inviting you to find your file. You next
get this dialogue box inviting you to find your file.Files are usually in /bin, /sbin, /usr/bin or /usr/sbin. You can also find them in your home directory - /home/paul/bin for example. Pick your file and click on 'OK' |
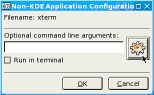 Next, you
get this little dialogue box inviting you to add
arguments to the command line and specify whether or not
you want it to run in a terminal. Here, instead, we are
interested in changing the icon so click on the icon
button. Next, you
get this little dialogue box inviting you to add
arguments to the command line and specify whether or not
you want it to run in a terminal. Here, instead, we are
interested in changing the icon so click on the icon
button. |
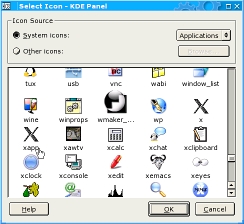 Now, you
get to choose from system icons for any of the groups of
applications actions and so on. Now, you
get to choose from system icons for any of the groups of
applications actions and so on.If you have one of your own, you can point it at that. You can make one quite easily with the GIMP and remember that you can make them transparent. Just look at those already on the system. |
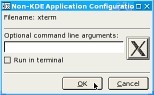 Once you
have selected your icon, you see it in the button on the
right and you have your last chance to edit any command
line options before you commit. You can always edit these
later on by right-clicking the icon and editing its
properties. Once you
have selected your icon, you see it in the button on the
right and you have your last chance to edit any command
line options before you commit. You can always edit these
later on by right-clicking the icon and editing its
properties. |
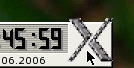 Once you
click on 'OK', it appears in the panel that you
originally right-clicked. Once you
click on 'OK', it appears in the panel that you
originally right-clicked.Here it is with icon zooming enabled. If this is not quite the right place for you, you can easily move it. |
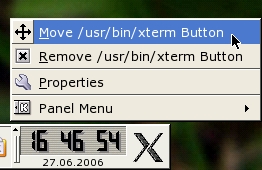 Just
right-click on the icon and select 'Move ...' as in the
screenshot on the right. Just
right-click on the icon and select 'Move ...' as in the
screenshot on the right.You can now slide it along the panel until it is where you want it. Note that you don't have to keep the mouse cursor on the panel to do this as the icon tracks the mouse movements. Once you have it in the correct place, just click the mouse - again, this does not have to be on the panel (if you have panel hiding enabled, the panel might disappear but clicking the mouse still moves it in the same way that it would have if the panel was visible - just move the mouse where the panel is so that it becomes visible again as you would if you were using it normally). |
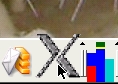 And here it
is, with icon zooming enabled. And here it
is, with icon zooming enabled. |
'vi' survival guideUsually, the only time you will need to know how to edit a text file using a text-only interface will be:
Whilst vi is quite complex and there are other programs (see below) vi is one that is very likely to be on a system and whilst it can be daunting the first time you use it, for simple text editing, there are only a few commands in vi that you need to know. Ideally, you should have a play around with vi and get used to the way it works. If the first time you use it is in a real situation, you will be at a disadvantage. |
|
Different ModesFor the reason that it needs to be compatible with situations where arrow keys and some other keys are not accessible, some functions need to use normal character keys. As the program needs to know whether you mean to insert a letter 'h' or move one character to the left, it needs a way of telling the difference and it does this by using two different working modes: command mode and insert mode.
|
 Starting
vi
Starting
vi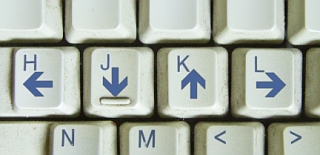 Command
Mode
Command
ModeRunning PICO and PINEPico and Pine are two handy little programs that originate from the University of Washington (in the USA, not the original Washington in the UK). Pine allows you to create and read email and Pico allows you to edit text files. Both are lightweight and will work via a remote, text-only terminal. |
|
 and the
program will open up displaying the address headers,
inviting you to add a carbon copy address, attachment and
a subject to the email - you can add to the categories
using one of the control functions listed at the bottom
of the screen. and the
program will open up displaying the address headers,
inviting you to add a carbon copy address, attachment and
a subject to the email - you can add to the categories
using one of the control functions listed at the bottom
of the screen.If you take the cursor down to the message text, you can edit it but unlike sendmail, you can go back through it and change other lines as well as the header information. Once you have finished, just use the control functions to send it. |
 If you
pick up the mail using your regular graphical mail
browser, it will have all of the usual headers (as well
as the message, of course) and looks just like any other
email. If you
pick up the mail using your regular graphical mail
browser, it will have all of the usual headers (as well
as the message, of course) and looks just like any other
email. |
 If you
just enter 'pine' on the command line, you will get the
mail reader. If you
just enter 'pine' on the command line, you will get the
mail reader.This presents the menu on the right and will allow you to configure it for sending and receiving emails. The program is fairly easy to navigate although there is a lot that can be configured if you are going to need to use this as your only mail program. |
 This is
how an HTML email looks on pine (which is pretty much the
same as it does on any properly configured email browser
- remember that you should, for security purposes have
HTML email switched off). As this doesn't format the text
(remember that it is not a GUI program), any security
breaches involving this program would have to come from
another direction. This is
how an HTML email looks on pine (which is pretty much the
same as it does on any properly configured email browser
- remember that you should, for security purposes have
HTML email switched off). As this doesn't format the text
(remember that it is not a GUI program), any security
breaches involving this program would have to come from
another direction.You can see why HTML email is deprecated. |
|
 Pine
Pine Pico
Pico