 |
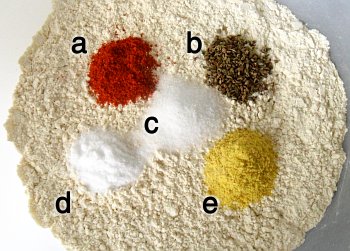
a) chilli powder; b) ajwain seeds; c) salt;
d) sodium bicarbonate; and e) asafoetida. |
Put the urad flour, salt, sodium bicarbonate, asafoetida, ajwain and chilli powder into a bowl and mix them together.
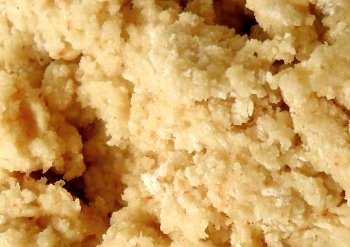 |
The dough should resemble
this - grainy and sticky. |
Add most of the water and mix it together.
The dough should be stiff and sticky.
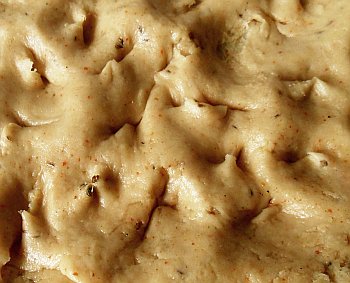
Keep on adding water until the dough is uniform like in the photograph on the right.
If you add too much water, add a little more flour.
Cover it and put it to one side for 20 minutes or so.
 |
Smear oil on the surface so that it doesn't
stick to anything and hit it with the pestle. |
The particles of flour are irregular and will lock together but we need to make a smooth dough out of them so the next thing we need to do is smash off those corners.
Wet your hands with some oil and pick up the dough, covering it with oil. Get as much off the inside of the bowl as you can.
Flatten it down onto a chopping board so that it is around 1cm thick and then systematically beat it with a pestle, making sure that all of the surface of the dough has been hit.
When done, fold it over to make a new layer and repeat the process.
Keep on doing this until the dough is soft and free-flowing (relative to when it started out).
 |
Stretch it repeatedly and
eventually, it will look like this. |
Now, we need to stretch the dough.
Pull it out and it will break.
Put the two pieces together again, side-by-side and pull again.
Keep on doing this and you will notice that the length at which it breaks gradually gets greater.
Eventually, they will pull out to be a long piece, just like in the photograph.
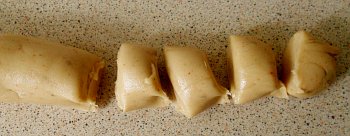 |
Roll into 2cm diameter roll
and cut into 1cm lengths. |
Now, roll it into a ball and then into a cylinder shape that it roughly 2cm in diameter.
Using a knife with oil on it, cut it into 1cm long pieces.
You will find that it is better if you use a piece of wire to cut this because the grains still lock together and when you try to cut by inserting a wedge (your knife), they will lock and make it difficult.
With a wire (or a piece of nylon fishing line or similar) the dough is not restricted once the cutting edge has passed and so it is easier to cut - (this is the same with cheese which is usually cut in shops using a wire rather than a knife.)
Put the small cylinders ('tikka' is what they are called) into a lunch box to stop them dying out.
We are now faced with a number of options on how to proceed. However, it is worth noting that unlike the papads that you buy in the shops, we don't want round ones, we want papads that will fit in our lunch box so a nice elliptical shape roughly 3" x 6" will do.
The options for preparation are:
- Wet roll (oil)
- Dry roll en-masse
- Dry roll individually
- Press them
Really, you need to be able to make them fairly uniformly flat and the right shape and size.
Wet-rolling:
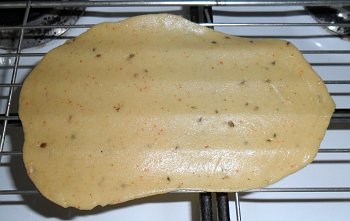 |
Wet-rolled papad,
drying out. |
Smear some oil on the work surface, on your hands and on the rolling pin.
Take one of the dough pieces and smear some oil on that.
Flatten it out with your hands and then roll it into a lunch-box shaped piece - re-oiling the surface/rolling pin as required.
You need to get them fairly thin but on the negative side of this, the thinner you make them, the more inclinded they are to stick to the rolling in, making it tear when you are rolling it; and/or stick to the surface, making it more inclined to stretch and tear when you try to take it off.
When you have your papad, put in on a cooling tray to dry out - if the oven is on for some reason (some other cooking perhaps?), it will dry out a lot quicker.
I would recommend drying them out in the sun but in the UK, there isn't a lot of that so a reliable indoor method is needed as a stop-gap just in case it isn't sunny (almost all of the time).
Dry-rolling - many at a time:
There are two options with dry rolling - this is because they won't stick together - if there is enough urad flour between them.
The main disadvantage is that you end up with urad flour on the papad that hasn't been through the beating and stretching process. Try it and judge for yourself.
- The first option is to make small, flat, uniform papads and layer them up with plenty of urad flour between them. When you have enough, your press them flat, carefully and gradually.
You need to make sure that your flour layer is not getting too thin - if it does, the layers will stick together as one and you will end up with a block.
The other main disadvantage is that the layers will tend to overlap so you might end up with one layer being a bit short and the adjacent layer, being twice the thickness around some of its edge.
- The one at a time method below is easier and quicker once you get it going.
Dry-rolling - one at a time:
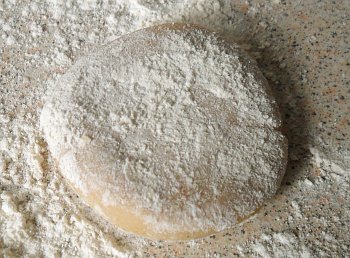 |
Dry-rolling. Start with a
ball and some urad flour... |
Take your dough ball and cover it in flour.
Flatten it a bit.
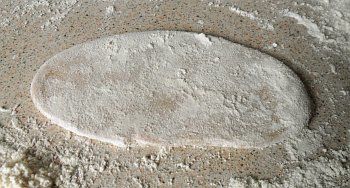 |
Rolled out to around
three times its width. |
Roll it out so that it is around three times its width.
Dust it with flour and turn it over.
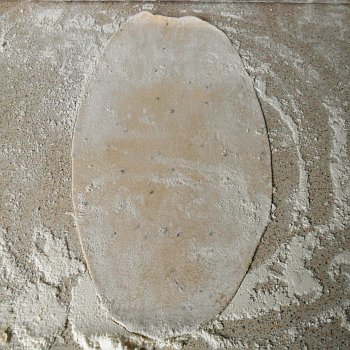 |
Now to full lunch
-box size and shape. |
now roll it out so that it is around 15-20cm long by 7-10cm wide.
That should mean that its thickness is small enough for you to start feeling the ajwain seeds under the rolling pin.
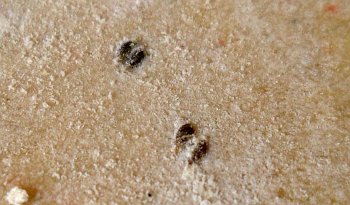 |
Ajwain seed pairs, separated
by the rolling process. |
Ajwain seeds often end up as pairs of seeds, side-by-side.
Here, you can see that the ajwain seeds have separated as the rolling pin has flattened out the dough mixture.
You will quite often notice this in commercial papds.
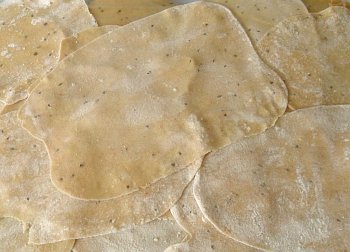 |
Finished dry-rolled
papads drying out. |
With dry-rolled papads, you don't need to make sure that they are kept separate because the flour will make sure that they don't stick together.
Here, they are on a cooling rack.
Pressing:
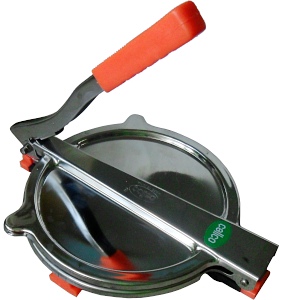 |
A puri press is designed specifically for doing
this and similar jobs. It is quick and easy. |
A puri press takes all of the hassle out of producing papads by simplifying the process.
Use two sheets of polythene - or a plastic bag, slit down the sides.
Place the dough ball in the middle of the bottom sheet on the press.
Put the other sheet on top of it.
Lower the top press plate and flatten it.
Lift the top plate up and pull the papad, still sandwiched between the two sheets of polythene, out of the press.
Peel one of the sheets off and put it on the drying rack.
Peel the other sheet off.
Rolling out a papad by hand can take a minute or so whereas the pressing part of this can take around 5 seconds - the other parts of the priocess being essentially the same.
Now that we have made our papds, we need to cook them.
The options for cooking are:
- Grill
- Dry tava
- Toaster
- Deep fry
Grill:
 |
Under the grill -
with aluminium foil. |
Here, the grill itself is used for other things so I opted to grill them on some aluminium foil so that they would stay clean.
Whilst they do stay clean, there is nowhere for moisture to escape to from the underside of the papad.
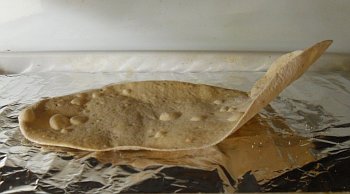 |
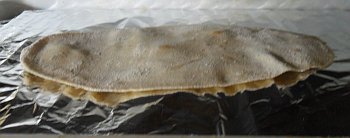
and ... on the
other side. |
Consequently, when you turn it over, it curls up to some extent.
Additionally, the grill isn't hot enough to brown it very quickly so I had to resort to lifting up the grill try to the flames to get them to brown.
Dry Tava:
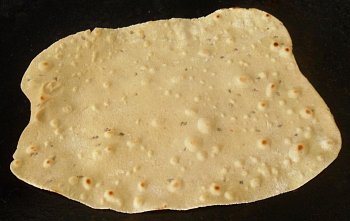 |
Papad on a
hot tava. |
The tava heats them well where it touches the papad.
This turns out to be wherever it forms bubbles.
The disadvantage of this is that the rest of it needs more cooking that it is going to get very easily and whilst it looks as though it should be nice and quick, it isn't.
Toaster:
I'm not even going to show you how to use a toaster to do this.
I'm not even going to tell you how I did it.
However, if you are going to have a go, remember that papads go soft during the cooking process and that tongues conduct electricity.
Whilst I can do it and have done it safely over the years, I wouldn't recommend that anybody else does it.
Deep-Fry:
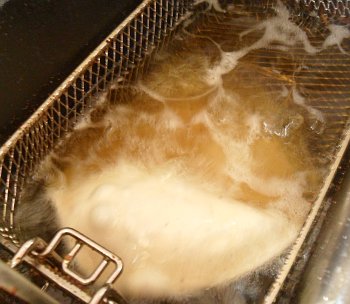 |
When deep frying, they
quickly rise to the surface. |
Heat the oil in the deep oil fryer to 190 Celsius.
Lower the papad into the oil so that it submerges completely - use tongues or something to push it under.
It will rise quickly as water vaporises from its surface and as it bubbles up.
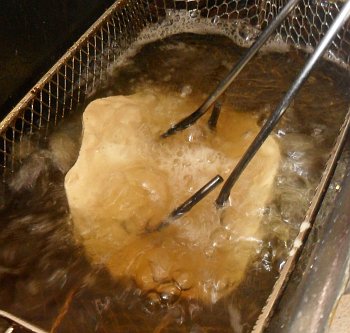 |
Hold it under for a short
while - just to make sure. |
Hold it under with the tonges and turn it over at some stage during this.
When the large bubbles stop coming up, it is ready.
At 190C, it should brown a bit by the time it is ready.
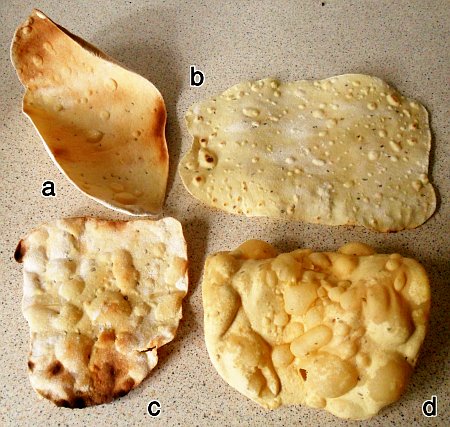 |
You wouldn't think that these were all from the same mixture.
a) grill; b) dry tava; c) toaster; and d) deep fried. |
You can see from the results on the right that the four different cooking methods produce four quite different sets of results.
- under the grill - dry, powdery, strong
- on the tava - delicate, strong
- in the toaster - dry powdery, strong
- in deep oil - oily, powdery, brittle.
The two grill options - grill and toaster - produce the better papads as far as strength goes whereas the deep oil papads have the most flavour.
They are also the most fun to make.
Really, you need to try out some of the methods here and see what suits you best.
Personally, I go for the deep fried ones.
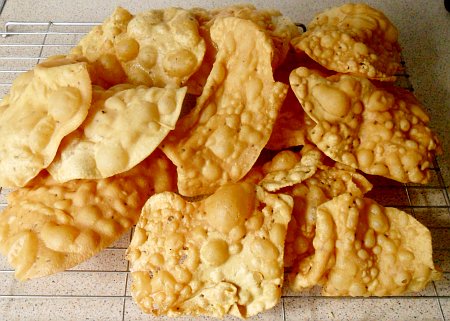 |
A pile of papads, ready to eat.
|