 |
Line a microwave cake mould.
|
First of all, line a 17cm (7") microwave-compatible cake mould with cling-film. You can see how to do this on the cheats page.
Once you have done that, put it to one side where it is not going to get dirty.
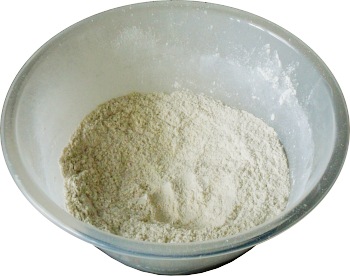 |
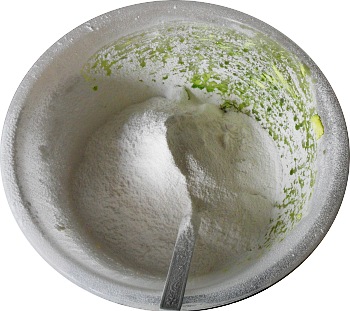
Mix all of the dry ingredients
together first and make a well. |
Into a clean, dry bowl, add the dry ingredients - sugar, salt, chapatti atta and sodium bicarbonate.
V1: (This is the stage in the recipe where you would add powders if you were making an alternative such as cocoa powder in chocolate cake variant - see 'Variations' at the bottom of the page for these.)
Mix them together well and make sure that there are no lumps in there.
Make a well in the middle so that the liquids we are going to add next all stay together.
V3:
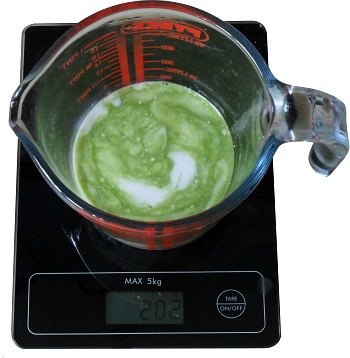 |
Mix the Pandan Paste and coconut milk.
|
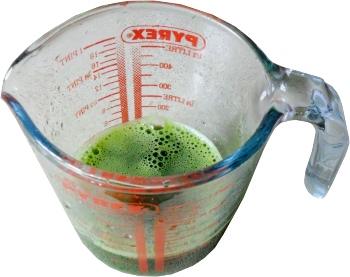
Into a jug, add the pandan paste and the coconut milk.
The coconut milk gives it a Thai-type flavour but if you don't like it, just use water instead.
The Pandan paste can be difficult to obtain so if you can't get hold of it or make your own, just use a teaspoon or two of pandan essence in the next step instead and in this one, substitute it with water.
So, just to recap: you should have in the jug:
- 100mls of pandan paste and 100mls of coconut milk; or,
- 100mls water and 100mls of coconut milk (remembering to add a teaspoon or two of pandan essence in the next step at V2); or,
- 100mls of pandan paste and 100mls water; or,
- 200mls of water (remembering to add a teaspoon or two of pandan essence in the next step at V2).
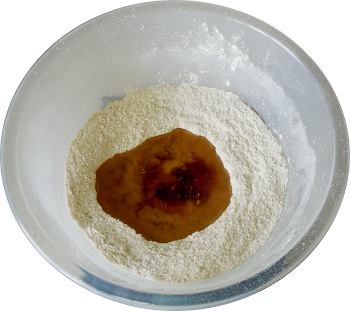 |
Into the well, put the oil and vinegar.
|
Into the well in the flour mixture pour the 80mls of peanut oil.
This wets the surface of the flour mixture where it comes into contact with it and acts as a barrier to anything that has water in it, thus preventing mixing.
The idea behind this is that you manage to keep the acid away from the bicarbonate until you actually mix the two together, thereby controlling when the mixture produces the carbon dioxide gas that makes it a sponge instead of a solid slab.
V2: (At this point you would add any essences to the oil so that they sink to the bottom of the well but don't mix with the flour.)
Now add the vinegar.
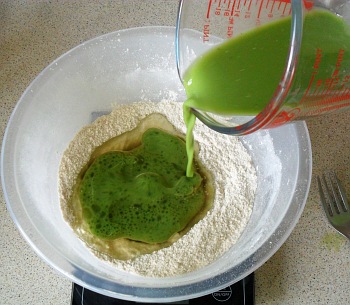 |
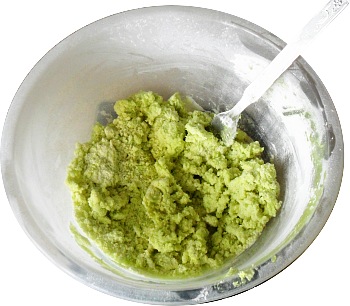
Add the Pandan and coconut to this.
|
Next, add the 200mls of liquid.
Then, fold it into the flour mixture so that it forms an even mixture - a loose paste in the English sense of the word (as opposed to the 'Pandan paste' sense of the word).
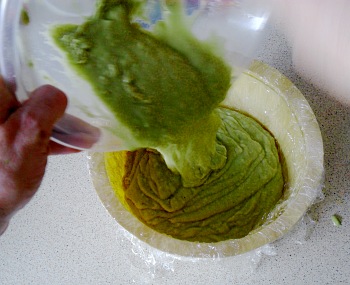 |
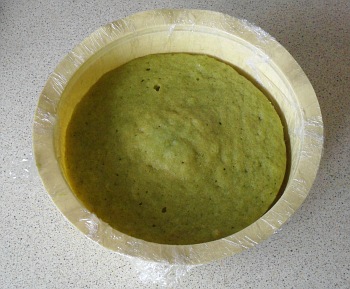
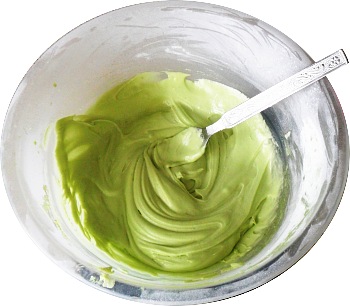
Mix without beating and pour into the mould.
|
Don't beat this.
The acid reacts with the bicarbonate that you have added and gives off carbon dioxide gas which fizzes and makes this a cake that rises.
If you haven't added enough acid, there will be some bicarbonate left - this is not as good as there being a little too much acid.
Tap it a few times just to make the surface fairly even - you aren't trying to separate out the bubbles here, just make it fairly close to flat.
Put it into the microwave oven on full power for around 7½ minutes for a 850watt oven.
 |
Heat for seven and a half minutes.
|
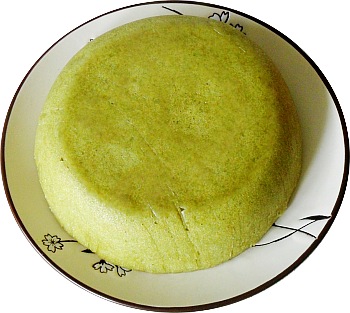
Using a microwave oven to cook this is better than using a conventional oven because you don't end up with a crust on the outside - it is inside all of the way through from outside to outside.
As a result, there will be no layer of dehydrated, partially caramelised cake that acts as a flavour and texture barrier as you go from icing to cake on the inside.
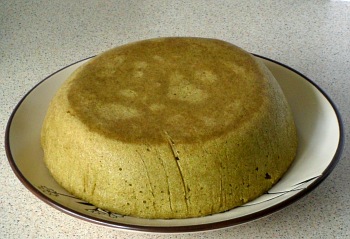
Like all ovens, the microwave will tend to cook from the outside.
As the temperature increases, carbon dioxide is released and the volume of the cake increases.
Thus, the outide sets first and as the cake volume increases, the inside continues to expand until it sets.
As a result, the inside of the cake sets higher than the outside and you end up with a little hill of cake as you can see in the photograph on the right.
 |
Turn out and let cool.
|
If we were to turn the cake out as it is, the cake-mound in the middle would press against what had become the top when it is turned upside down and still hot, the whole thing would crack (it does, I've tried it).
In order to prevent this from happening, get a fork and remove the hill in the middle before you turn it out, so that the top of the cake is fairly flat.
Now take your flat(ish)-centred cake and position a plate (or a foil coated cardboard cake board if you want) on it centrally, then, in one go, turn it all upside down.
Remove the mould and the cling-film and put it somewhere safe to cool down.
Don't put it in the refrigerator when it is hot because you will heat up the other things in the refrigerator and that will not do them any good.
 |
Mix the margarine and dye if
required, along with essence. |
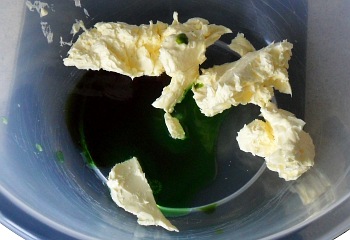
Into a clean dry bowl, put the margarine and if it is a bit cold or in a bit of a block, just break it up with a fork.
V4: At this point, add the food colouring and essence.
 |
Make sure it is well mixed
with the magerine. |
Mix it in well until it is evenly distributed amongst the margarine.
In this way, you can see any lumps of margarine that have not been broken up - any margarine lumps that get through the process will form fatty nodules that will tend to spoil the icing experience.
 |
Sift in the icing sugar.
|
Sift the icing sugar into the bowl.
In dry weather, you might find that you get an electric shock off the sieve if it is a metal one with a plastic handle - a fork or spoon or whatever you are using to nudge the icing through the sieve gets close enough for there to be a spark.
When sieving, electrons are separated and are either taken down with the dry sugar powder or accumulate on the metal sieve (I don't know which but it doesn't matter either way) and a charge builds up which I have seen jump around 5mm, equivalent to 5,000 volts.
 |
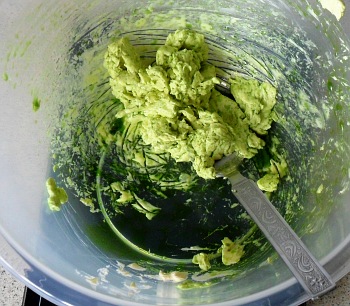
Mix it until it forms small balls.
|
Carefully fold the icing sugar into the margarine mixture.
You will find that the sugar is very fluid and will splash and flow just as though it was water, including not staying in the bowl.
Eventually, the icing forms little balls. At this point it is mixed in enough - if you continue, it will eventually form a thick paste which is difficult to mix in the next step.
So, when it looks like this, it is mixed enough.
 |
Add just enough water to
make a smooth, stiff cream. |
Very carefully, add water to the icing mixture, at no more than a teaspoon at a time, mixing in well each time.
By doing it like this, adding one teaspoon too much isn't that harmful. It doesn't take very much water to make a slurry and it is loose paste that we are aiming for.
The final, beaten icing should be stiff enough to be able to stand up in peaks but loose enough to be able to spread on the cake without damaging it too much.
If you add slightly too much water, you can add more icing sugar but there are limits.
 |
The cake should be cool by now.
|
The cake should now be cool enough to be firm enough to work.
If it is too warm, it will tend to break like any cake - not having eggs in it should not make it impossible or impractical to make a cake that you can ice.
If you want to make extra certain, you can leave it in the refrigerator for half an hour or so once it has cooled down to not much above room temperature - it is only hot things your shouldn't put the int refrigerator. If you do that, just cover over the icing with some cling-film so that it doesn't form a skin.
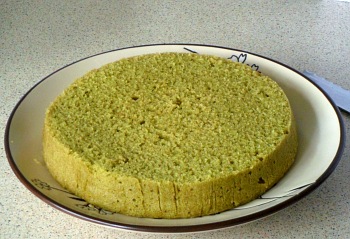 |
Cut it in half and put the top to one side.
|
Using a long knife - it doesn't have to be particularly sharp, a bread knife will do - cut the cake in half.
Carefully remove the top and place it in a safe place.
If you have not cut it particularly evenly or have formed a bit of a wedge, you can make sure that you get its orientation with the base correct by putting a little splodge of icing on the edge on the top and bottom pieces. This will allow you to fill the cake and then align the halves accurately enough once you have done.
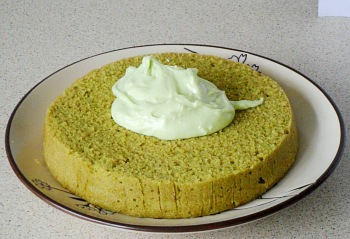 |
Put around 75g of icing
onto the bottom half. |
Put a splodge of around 75g of icing (can be more or less if you want) in the middle and then, using a knife, spread it out evenly.
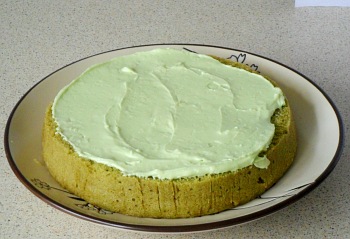 |
Spread it fairly evenly.
|
If you need to add more icing, make sure that you don't put crumbs back in the main quantity of icing that you have made - these don't look very good on the outside of the cake which is where the rest of it is going to go.
If the icing is damaging the cake too much as you spread it out - pulling the surface up too much - then you might want to take the opportunity to add just a little more water - a teaspoon or so, measured in - to the main quantity of icing you have made.
 |
Replace the top half and then put the
remainder of the icing on top of that. |
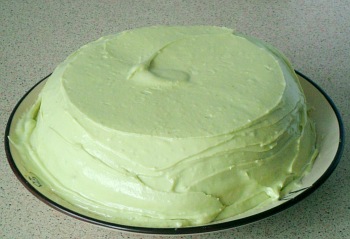
Carefully replace the top, aligning it with the icing spots if you have used them.
Put the rest of the icing on the top of the cake - that is where it is going to go any way so you might as well put it there in one go.
Whilst rotating the cake uniformly, spread the icing down over the top to form an even ring of icing around the top edge.
Spread this ring down the sides, filling in any gaps such as where your filling has gone - this should help to hold it in place.
Make sure that all of the gaps are filled in - this helps to keep the cake from going stale.
 |
Spread the icing evenly over the top and
down the sides so that it is all covered. |
Repeat the spreading process from top and sides until your icing looks reasonably even.
Remember, you are making the cake for work, not a competition so it doesn't matter that much what it looks like.
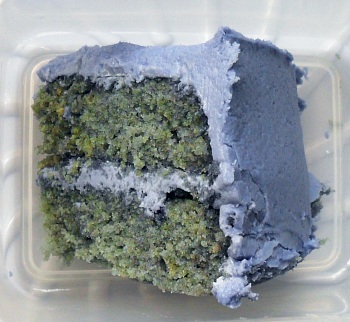
The cake in the photographs had icing on it that had just a little too much water in the icing.
Once you have finished icing the cake, leave it in a ventilated place to form a hardened skin on the icing.
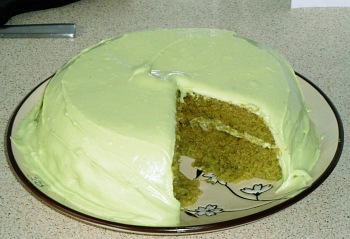 |
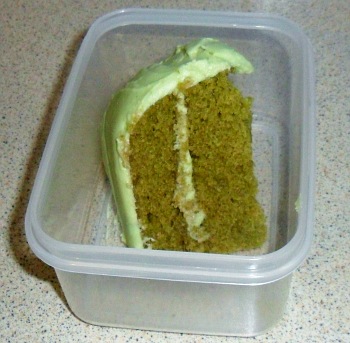
Let it stand for a while so that it gets a
slightly hardened surface then cut a slice. |
Once it has a skin on it, you can cut it.
A slice of cake will be all right in a small, air-tight tub like this for a few hours without going soggy.
If you leave it too long - maybe 6 hours, depending on the icing, temperature and so on - the moisture from the cake will soften the icing and it will form a more liquid layer next to the cake and the icing will fall off it.
A cake like this should last at least three days - I have had them last for five in the UK without forming moulds or drying out too much..
 |
One slice is good for your lunch box.
|
You can see how to add colourings and flavourings from the above so, if you wanted (for some reason), you could have red (strawberry); orange (orange); yellow (banana); green (pandan); and, blue (ube) cakes. Experiment - have fun.